Not sure how to optimize images for WordPress?
If you want to speed up your website and improve your Google PageSpeed Insights scores, it’s important to implement the best practices of image optimization, such as compression, resizing, lazy loading, content delivery networks (CDN), and more.
While setting up all of those tactics might sound complex, there are some great WordPress image optimization plugins that let you automate the whole process.
In this post, you’ll learn  how to optimize images for WordPress using a free plugin step-by-step (skip to see).
But first, let’s quickly talk about what role images play in Google PageSpeed Insights and performance.

What is Google PageSpeed Insights score?
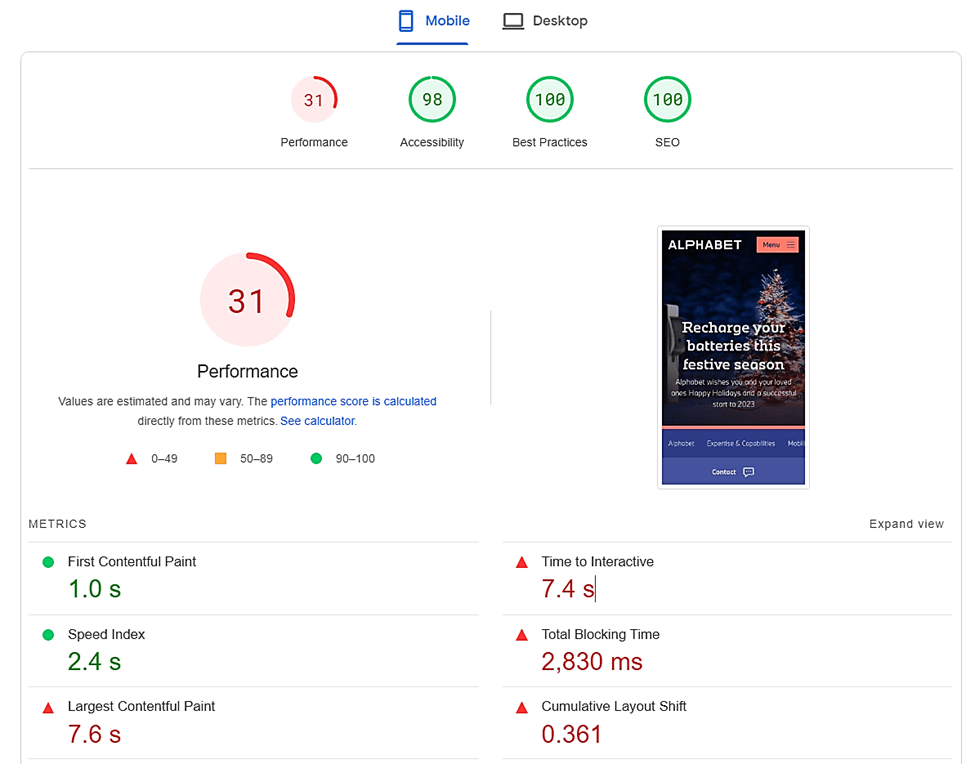
Google PageSpeed Score is the score that Google PageSpeed Insights awards a web page, upon evaluating its user experience on a grading scale of 0-100. It also goes by the names Google PageSpeed Insights Score, PageSpeed Insights Score, Google Insights Score, and PageSpeed Score.
Whatever you choose to call it, Google PageSpeed Score essentially shows how well your web page is optimized for its visitors. A high score indicates that your site is well-optimized for performance.
In general, the higher your score is, the faster your site will load for visitors.
Do images impact your Google PageSpeed Score?
Images can play a big role in web performance and Google PageSpeed Insights, which is why a lot of PageSpeed Insights diagnostics focus on optimizing your images.
To start, unoptimized images can affect your Largest Contentful Paint times and load times. For example, if you’re loading a large, uncompressed image in your site’s hero section, your LCP time will be a lot slower than it needs to be.
Beyond that, your site’s images can also affect your Cumulative Layout Shift metric if they’re loading in a way that causes layout shifts.
How to optimize images for WordPress with Optimole
If you want the easiest way to optimize images for WordPress and improve your PageSpeed Insights scores, you can use the free Optimole plugin.
Optimole offers a full-service solution to optimize images, including the following:
- Serve adaptive images that are optimally sized for each visitor.
- Compress images using lossy or lossless compression.
- Convert images to optimized formats such as WebP and Avif.
- Lazy load images.
Optimole will also automatically serve images via its built-in content delivery network (CDN), which helps you offer faster image download times across the globe.
These tactics will not only speed up your site, but they’ll also help you fix the many image-focused performance diagnostics in PageSpeed Insights, including the following:
- Serve images in next-gen formats.
- Properly sized images.
- Enable compression to reduce the size of resources.
Here’s how to use Optimole to optimize WordPress images:
- Install the free Optimole plugin
- Confirm images are being delivered from the nearest server
- Serve the right image size
- Ensure lazy loading of your WordPress images
1. Install the free Optimole plugin
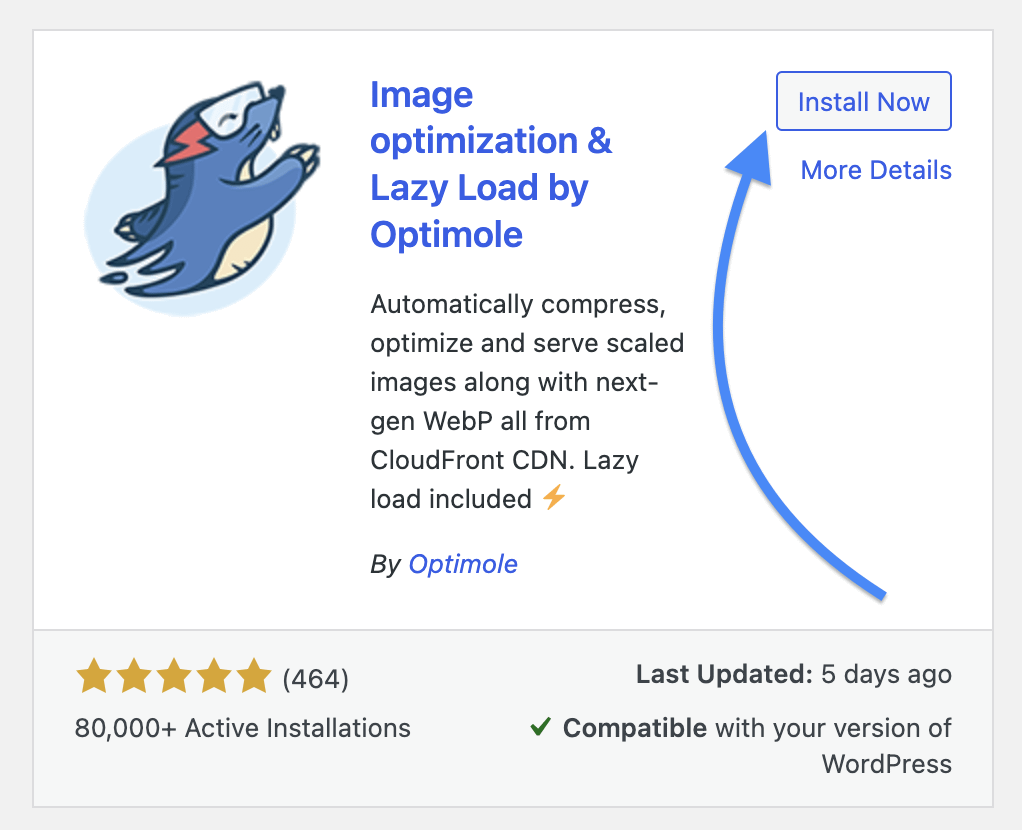
To get started, install and activate the free Optimole plugin.
In your WordPress dashboard, go to Plugins > Add New and search for Optimole. Then, click on Install, followed by Activate.
You’ll be prompted to register an account, after which the API token plus login details will be sent to your email.
At that point, you should go back to your WordPress admin panel, proceed to Media, select Optimole, and then choose I already have an API key.
You’ll find the API token prepopulated on the next screen, where you ought to click on the Connect to Optimole button.
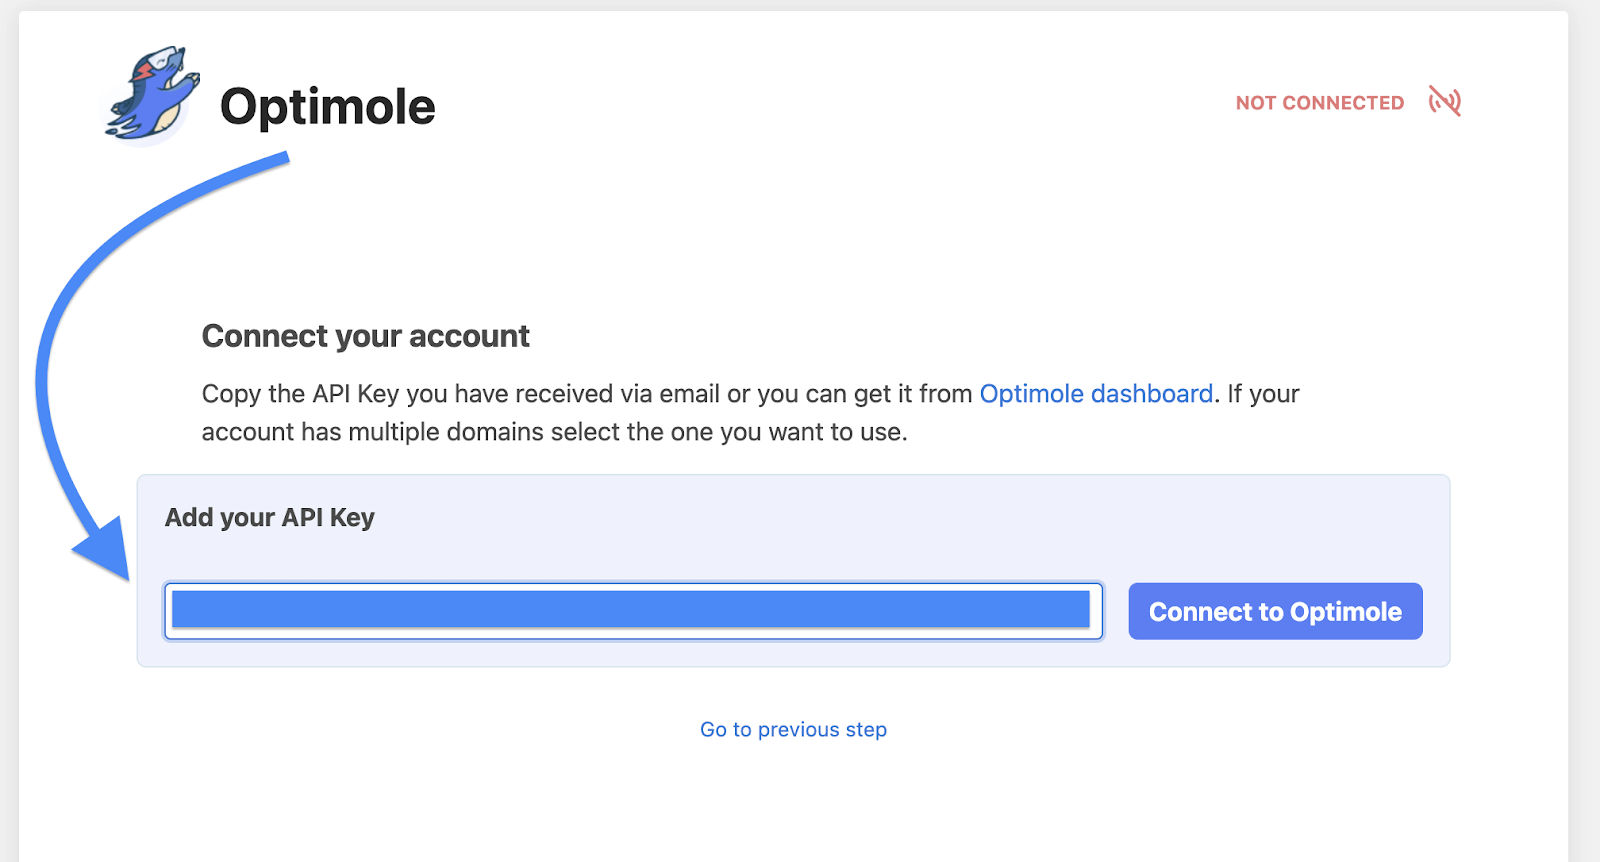
That’s all it takes and Optimole will start optimizing images on auto-pilot. You don’t even have to pay anything, as image optimization here is free for up to 5,000 website visitors a month.
2. Confirm images are being delivered from the nearest server
Optimole’s CDN is a content delivery network that automatically caches your WordPress image files and distributes them to more than 400 Amazon CloudFront servers around the globe.
This strategic positioning is meant to cut your image delivery time, as website visitors will be served the static files directly from the nearest CDN server.
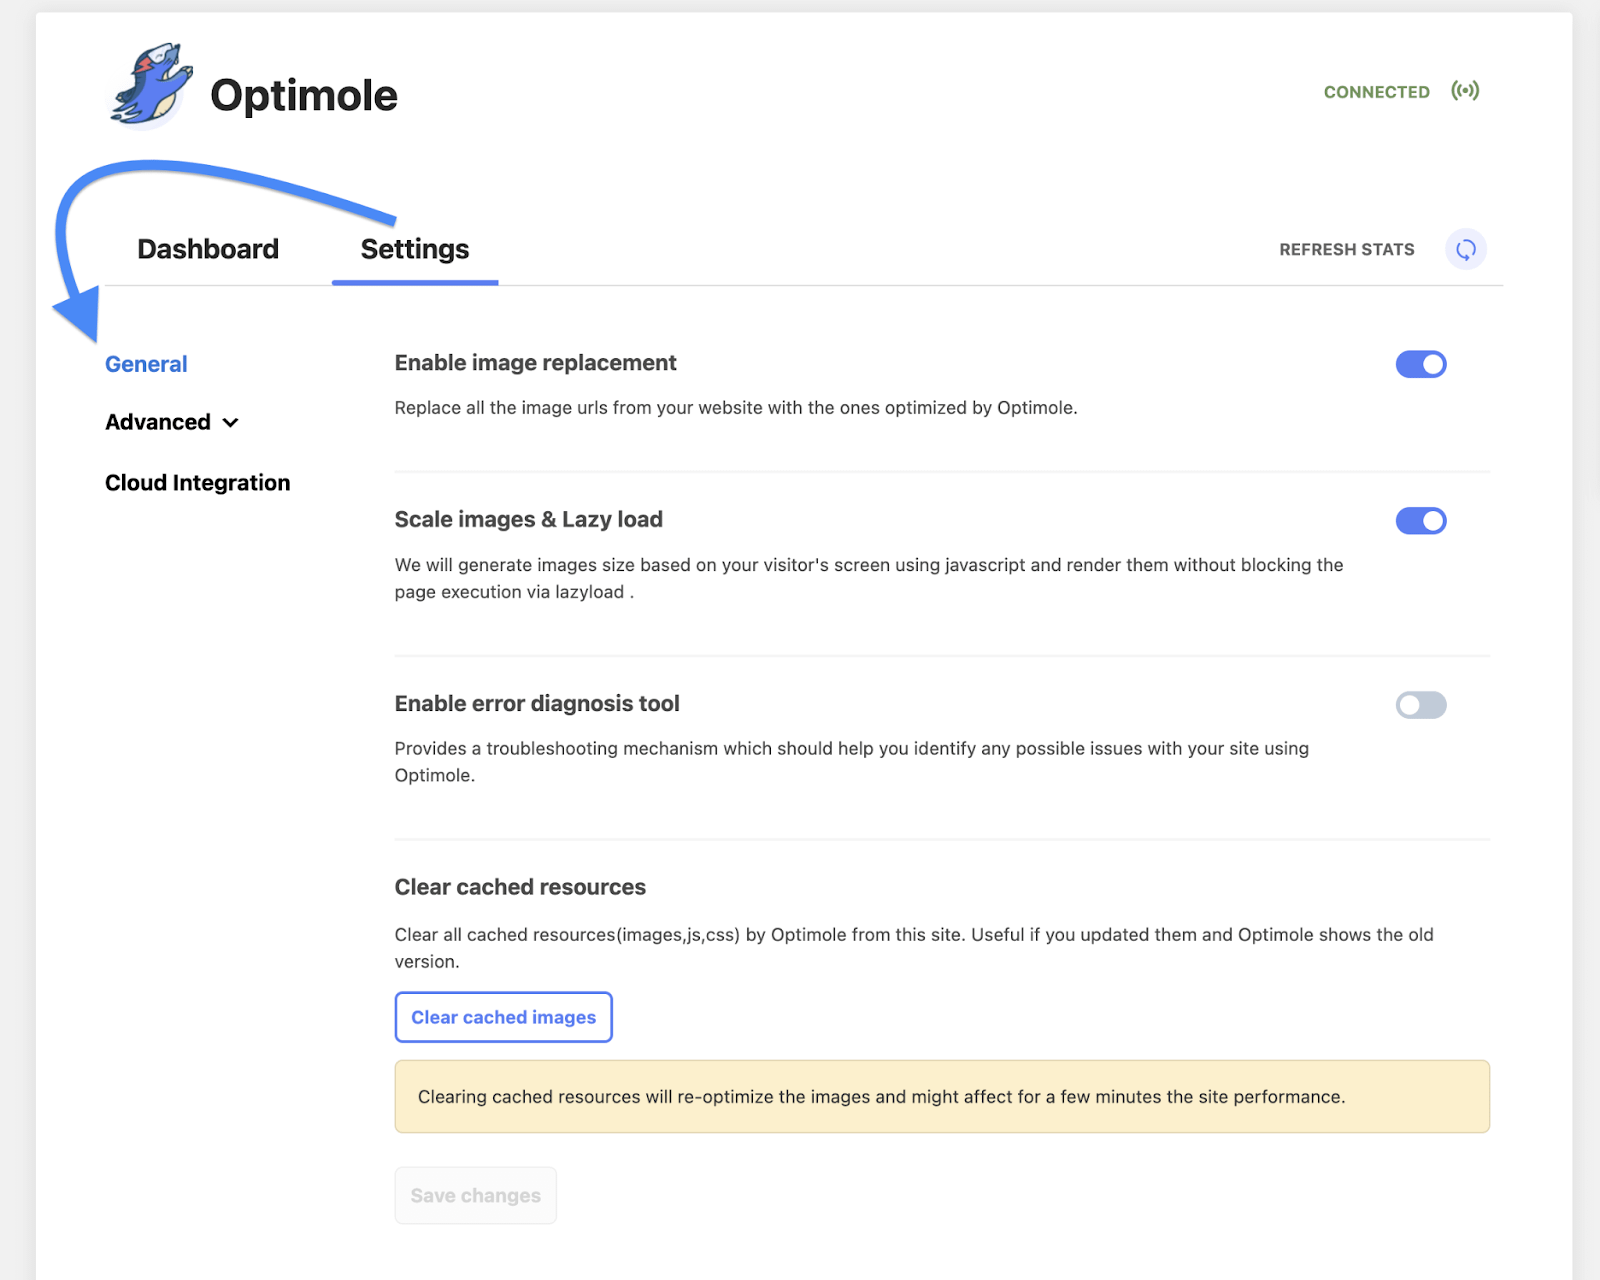
You can confirm that the feature is active by going to Media > Optimole, and then switching to the Settings tab.
Under the General section, you’ll see that Enable image replacement is on by default.
3. Serve the right image size
Another thing that Optimole is set to do by default is autoscaling images.
What this means is, it’ll automatically resize images and serve your website visitors the right sizes based on their screen dimensions. As such, they won’t be forced to wait unnecessarily for large images to load on their devices.
To verify that the option is enabled, go to Media > Optimole and then select the Settings Tab.
Under General, check and confirm that Scale Images & Lazy Load is on.
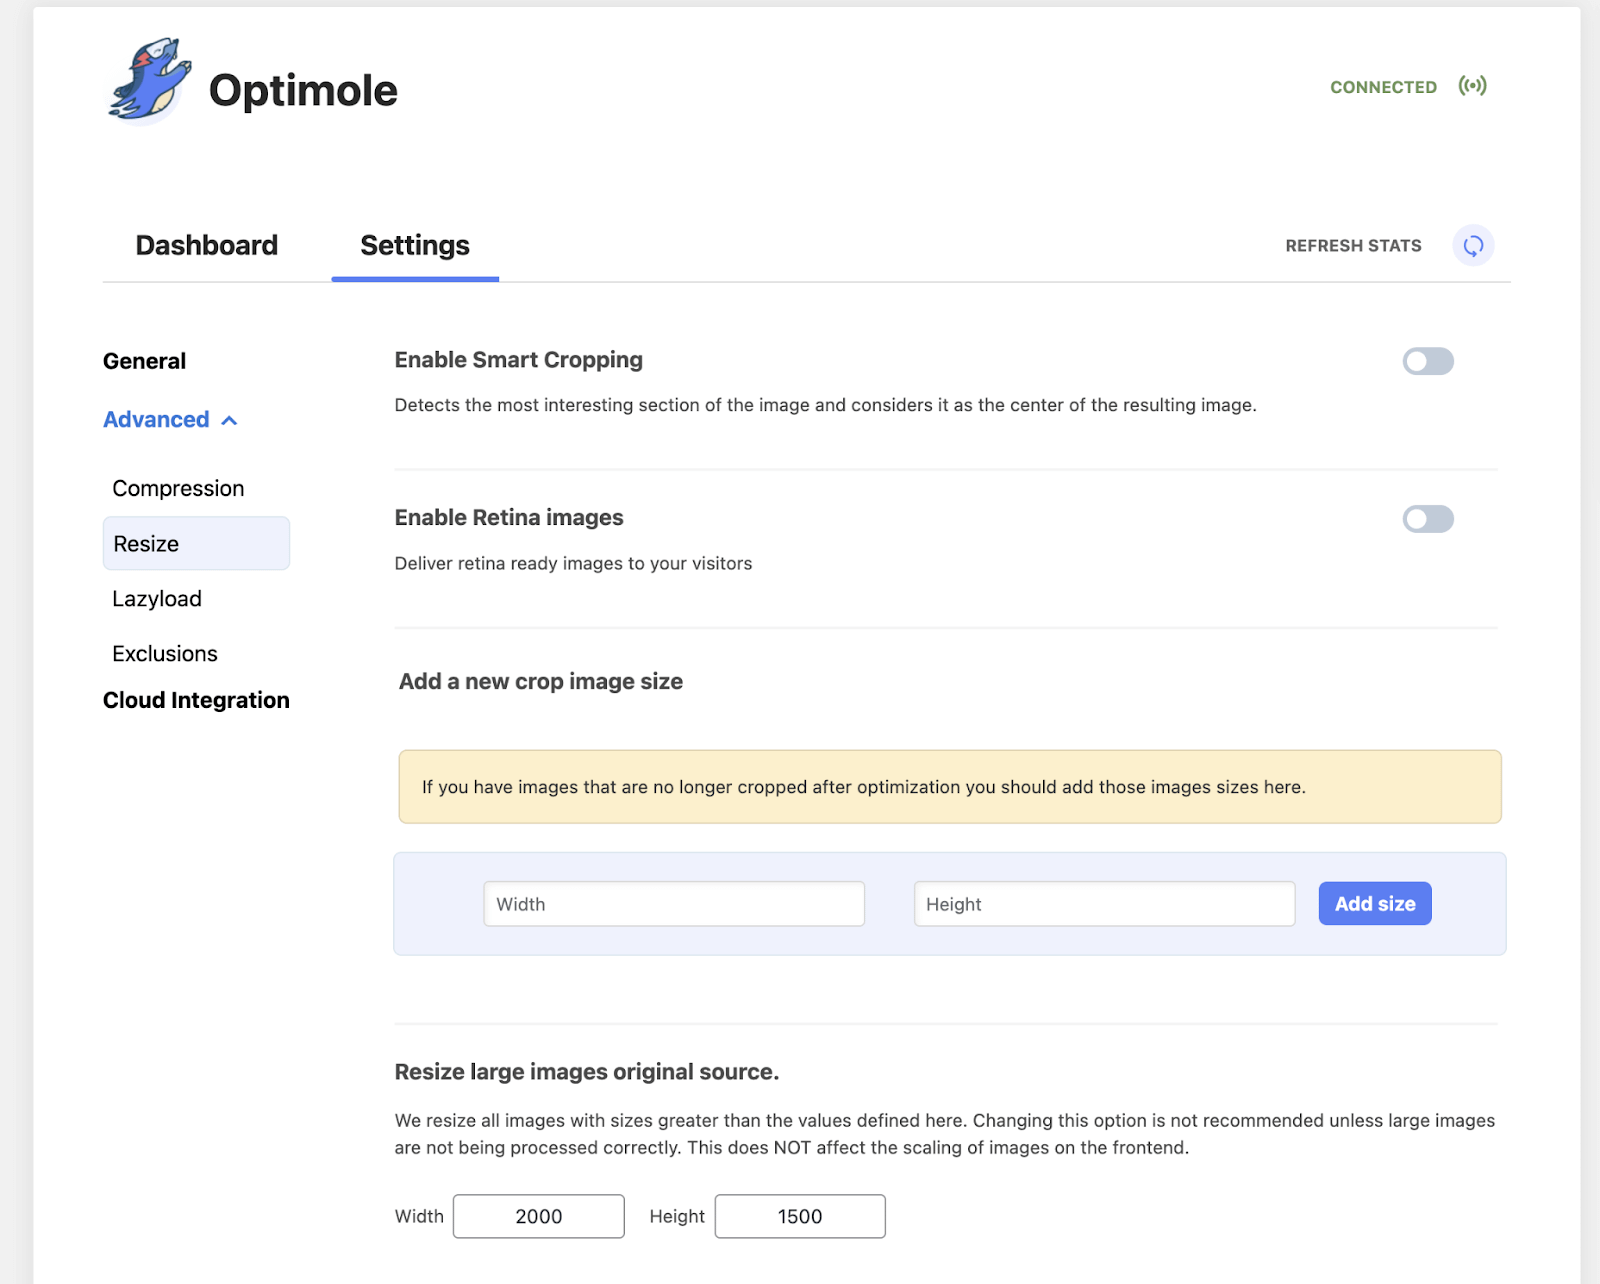
For more configurations, switch to the Advanced tab and hit the Resize submenu.
You can then choose to Enable Smart Cropping or Enable Retina Images.
4. Ensure lazy loading of your WordPress images
Lazy loading is what you’ll see Google PageSpeed Insights recommending as “Defer off-screen images.”
This means that, instead of trying to load everything at once, your website should hold off all the images that are not in your visitor’s viewport. It’s only when the visitor scrolls down to those deferred sections of the page that the images may be served.
You can think of it as sectional loading of site images. The point is to minimize bandwidth usage and allow the network resources to prioritize the most critical page assets.
Now, the good thing about Optimole is, it does all that without being prompted. Lazy loading is a default feature that kicks in as soon as you fully integrate the plugin with your WordPress site.
And get this – the mechanism itself operates without relying on jQuery or any other bloated JavaScript files.
You can access its controls through Media > Optimole, and then Settings.
Under the General tab, check and confirm that Scale Images & Lazy Load option is enabled.
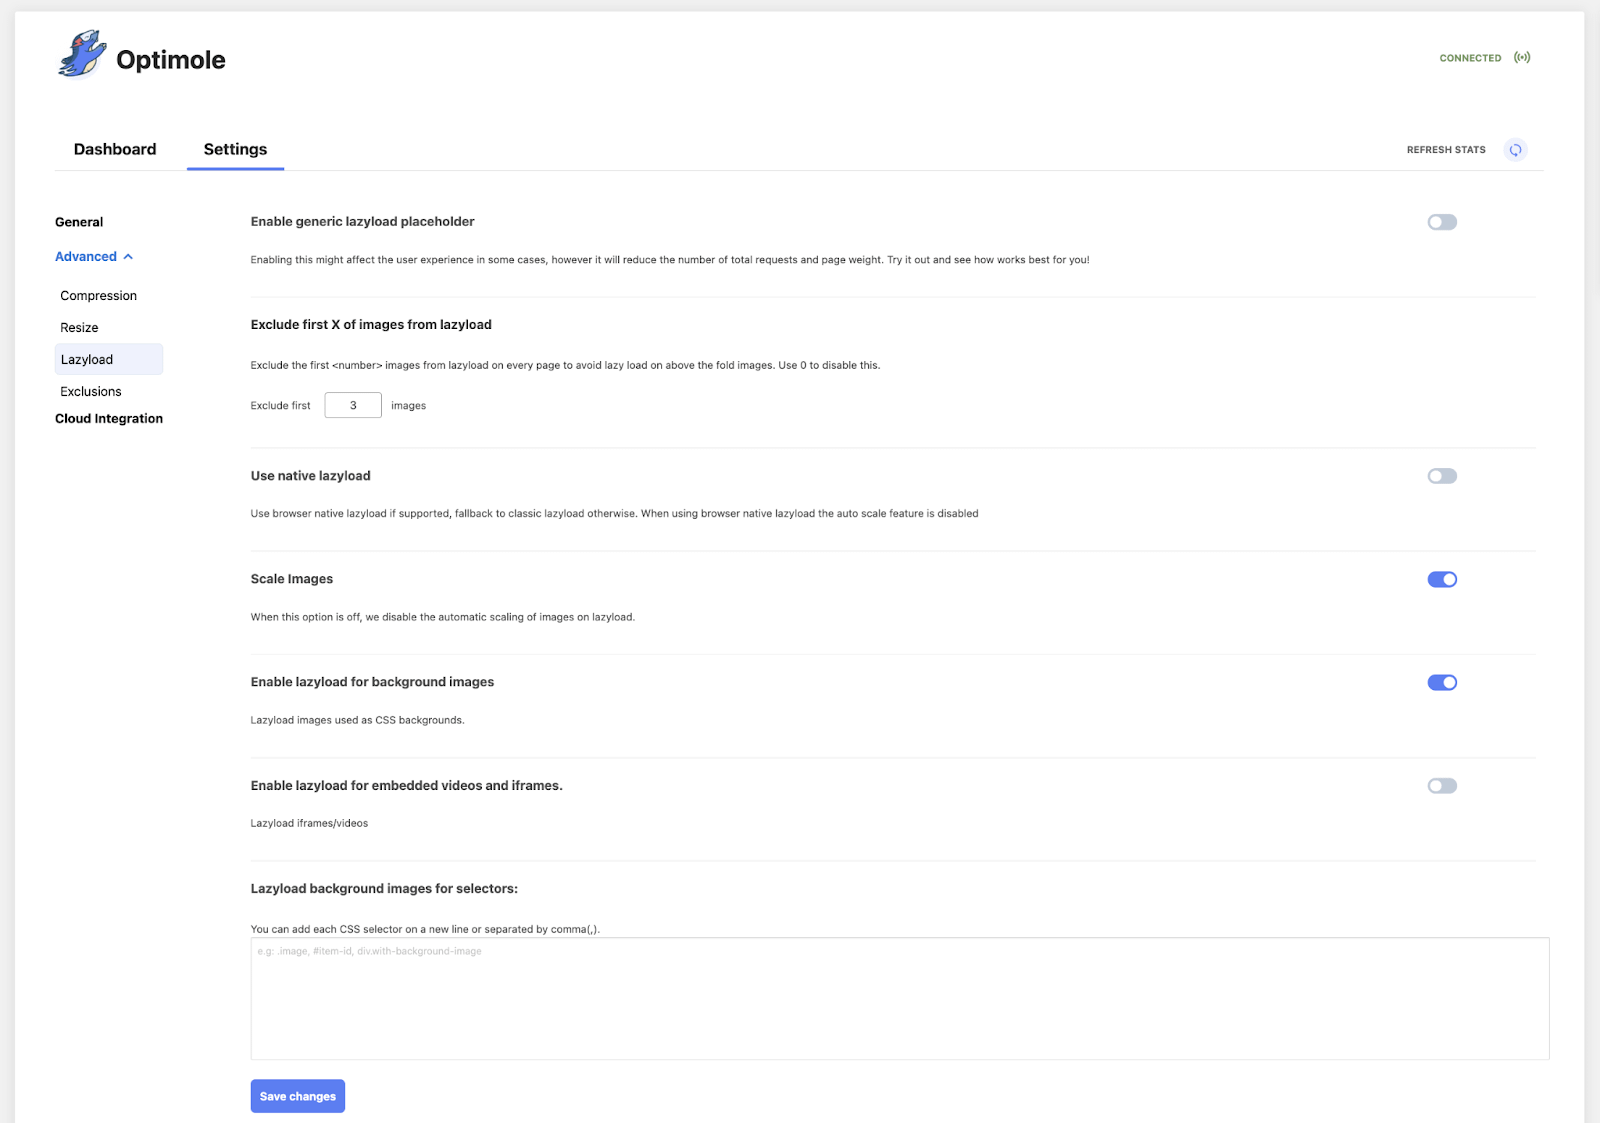
Otherwise, for more settings, proceed to the Advanced tab, and then select Lazyload.
This is where you Enable lazy load for background images, Enable lazy load for embedded videos and iframes, specify the images to exclude from lazy loading, as well as set the system to scale even the images on lazy load.
Once you’ve confirmed your options, click on the Save Settings button to set the ball rolling.
Conclusion on how to optimize images for WordPress today 
If you want to improve your PageSpeed Insights score and create a better experience for your visitors, learning how to optimize images for WordPress is important.
With the free Optimole plugin, you can automatically implement all the most essential strategies, including compression, lazy loading, a content delivery network, and more.
This will not only help you speed up your site, but it will also help you fix the image-focused diagnostics in PageSpeed Insights, such as “serve images in next-gen formats,” “properly size images,” and more.
If you’re ready to get started, install the free Optimole plugin today, and you’ll be up and running in no time.
Do you still have any questions about how to optimize images for WordPress? Let us know in the comments!
The post 4 Easy Steps How to Optimize Images for WordPress appeared first on Revive Social.
Revive Social