Twitter is one of the most popular social networking platforms, and for good reason. It enables users to instantly express their views to a vast audience, as well as tap into an expanding reservoir of resources and ideas. Because of this, it’s well worth learning how to integrate Twitter with WordPress.
A WordPress website and a Twitter account are both invaluable tools for improving your visibility online. By using the two together, you can expand your reach and build a loyal audience on both platforms. What’s more, there are a lot of simple tools that can help you integrate the two.
Why it’s smart to integrate Twitter with WordPress
At the time of this writing, Twitter is holding steady as the fourth most popular social media platform (outside of China). It boasts about 330 million active users each month. Regardless of your target audience, chances are high that a lot of your readers are using Twitter regularly.
In fact, Twitter caters to a wide range of demographics. While it’s most popular among the 18 to 29 age group, it’s used by a lot of older adults as well. There’s a fairly even amount of users in urban, suburban, and rural locales. The user demographics in terms of men and women is also relatively even.
All of this means that Twitter is an invaluable marketing tool for just about any business. If you don’t already have a Twitter account set up for your company, now is the perfect time to do so. However, you won’t want to stop there.
To get the most out of your Twitter presence, you can use it in conjunction with your existing WordPress website. By adding your Twitter content to your site, and vice versa, you can bolster your audience on both platforms. You’ll save time by using the same content in multiple locations, and create extra value for your website visitors in particular. Plus, you’ll be able to present a more unified and cohesive brand message.
Five ways to integrate Twitter with your WordPress website
Now, let’s discuss how to integrate Twitter with WordPress in a practical sense. There are actually quite a few ways to do this that will result in the platforms supporting, and improving, one another.
What follows are five of the best options – beginner-friendly techniques that are appropriate for nearly any type of site. You can choose to try just one, or implement all five. Let’s start with the most basic method.
1. Embed tweets into your posts and pages
Possibly the simplest way to integrate Twitter with WordPress is to incorporate Tweets within your content. While most of the methods we’ve listed rely on plugins, you can accomplish this one using default WordPress functionality.
Open up any page or post, and copy the URL for a Tweet you’d like to embed. Then, paste in the URL wherever you want it to go. WordPress will immediately convert it into a functional Tweet:
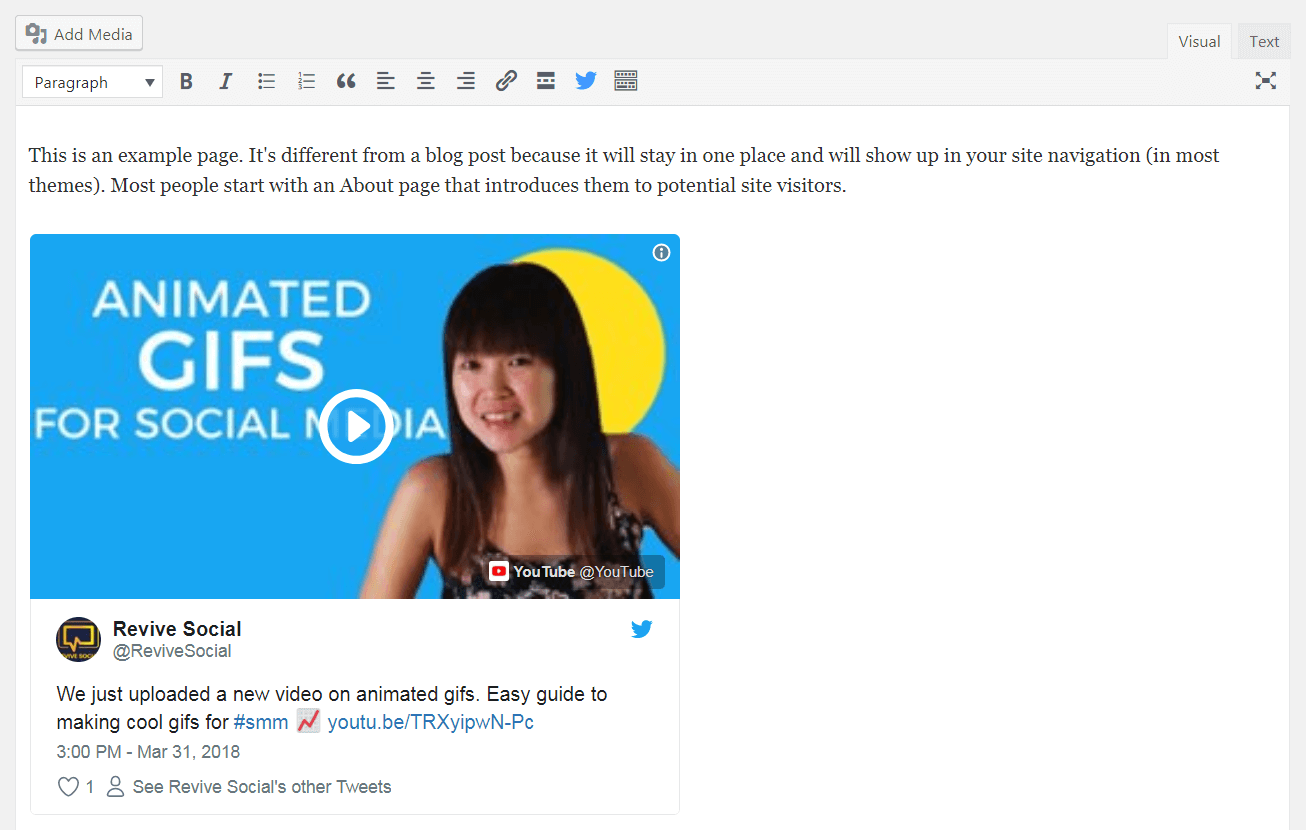
If you preview the page or post on the front end, you’ll see the Tweet displayed:

This technique couldn’t be simpler. You can use it to add your own Tweets to your content, promoting your Twitter account. Alternately, you can embed Tweets from leaders and experts in your industry, improving your site’s reputation and value in the process.
2. Include ‘tweetable’ quotes in your content
What if, instead of embedding existing Tweets, you want to encourage readers to share your content? This gives them a chance to be more engaged with your site. Plus, when your audience shares your messages with their own networks, it expands your reach with no extra work required on your part.
Technically, a reader could copy any part of your content that speaks to them and turn it into a Tweet. However, it’s smarter to encourage sharing by offering quotes that are already optimized for Twitter and can be shared to the platform with a single click.
You can do this using a few different plugins, although our favorite is the aptly-named Better Click to Tweet:

This simple tool does exactly what it needs to do, without any unnecessary settings. Simply install and activate it on your site, and it will be ready to use. When you open up (or create) a page or post, you’ll find a new Twitter icon in your editor:
![]()
By selecting this icon, you’ll open up a window that will enable you to create your Tweetable Quote:
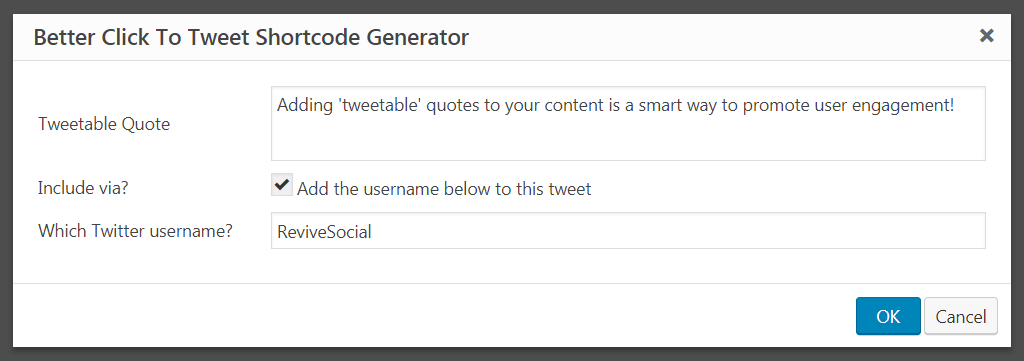
This can be something particularly memorable and shareable from within the content itself, or a completely new message. Either way, for best results you’ll want to keep the quote under Twitter’s default 280-character limit. You can also attach the name of your website or business Twitter account.
Once you click OK, a shortcode containing the quote will be added to your content. If you check it out on the front end, the quote should look something like this:
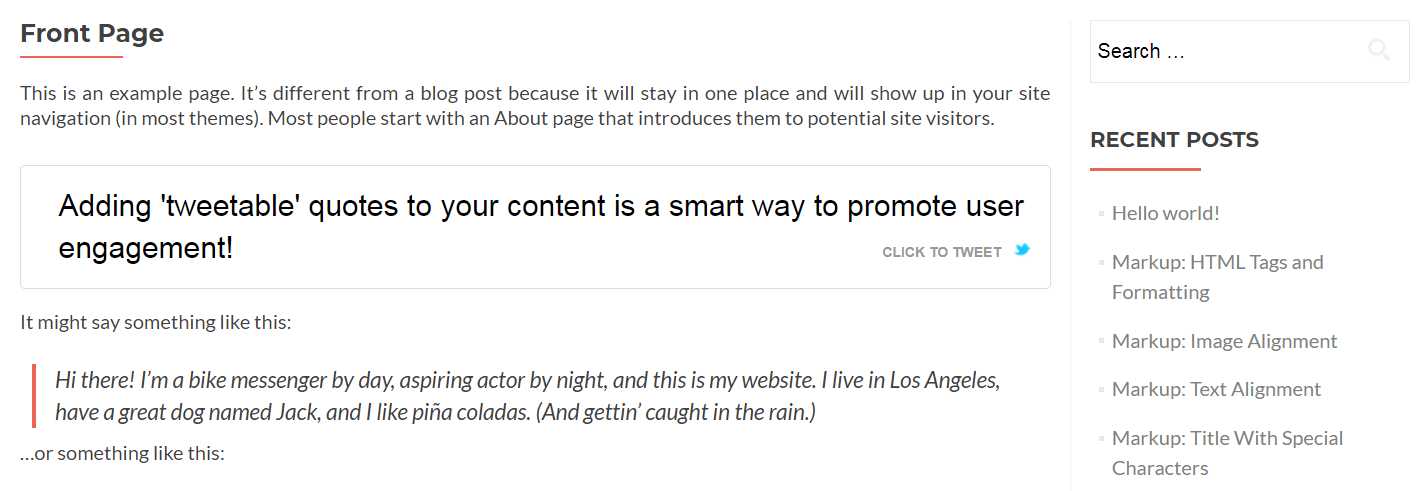
With that, you’ve given your readers something actionable to do – something that will lead anyone who sees their shared Tweet back to your own Twitter account.
3. Add your Twitter feed to your website
So far, we’ve addressed a few ways to integrate Twitter with WordPress by adding individual Tweets to your content. However, you may also want to consider incorporating your entire Twitter account with your website.
Doing this will enable you to display your Twitter feed on your site. Because you’ll be showcasing your latest Tweets, you’ll be providing extra value to your website’s visitors. Plus, it’s a smart way to promote your account and encourage people to check you out and follow you on Twitter.
There are a lot of plugins that enable you to add a Twitter feed to your site. If you have a favorite social media plugin already, it’s worth checking to see if it includes this functionality. Otherwise, we’d suggest giving Feed Them Social a try:

This plugin is simple to use, offers some handy customization options, and also supports other popular social media platforms (such as Facebook and Instagram).
When you install this plugin on your site, you’ll find a new tab labeled Feed Them in your main dashboard menu. Within that tab, you’ll want to navigate to Twitter Options:

The first thing you’ll need to do here is to log into your Twitter account using the button at the top of the screen. This will generate access tokens that will connect your account and website. Then, you can start customizing how your feed will look. By scrolling down, you’ll find options to show a follower count and a ‘follow’ button, display your profile photo, change the colors and dimensions of the feed itself, and so on.
When you’re ready, select Save All Changes. Then, switch over to the Feed Them > Settings page. Make sure Create Shortcode is selected, and pick Twitter Feed from the drop-down menu:
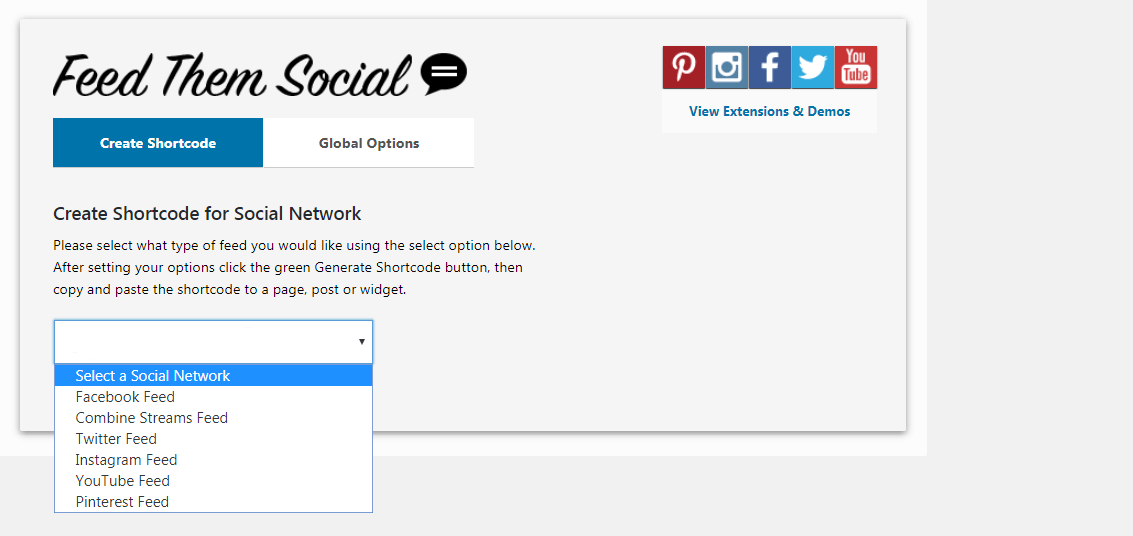
There are a few more options on this page, which you can set however you’d like. Then, choose Generate Shortcode:
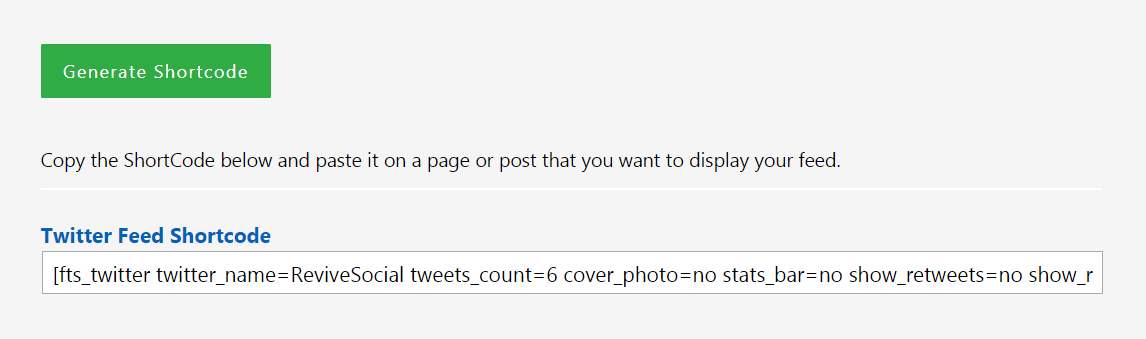
Simply copy this shortcode, and paste it wherever you’d like your feed to appear. This could be on a page or post, or even in your sidebar via a Text widget. Then, check your new feed on the front end to make sure it looks right:

Now, everyone who visits your website will see your latest Twitter activity and will be able to visit your account as well.
4. Place a ‘follow’ button on your pages
Instead of displaying your entire Twitter feed on your site, you could simply encourage visitors to check out your account. You can accomplish this easily by adding a Follow button to your pages.
This simple button enables visitors who are interested to look you up on Twitter. At the same time, it isn’t intrusive for those members of your audience who aren’t interested. You can add this button anywhere, although your home page is a traditional and effective choice.
While there are plugins that can carry out this task, you don’t actually need to install anything. Twitter itself offers a tool that will get the job done. To get started, visit Twitter’s Publish page, scroll down a little, and select the Twitter Buttons option:
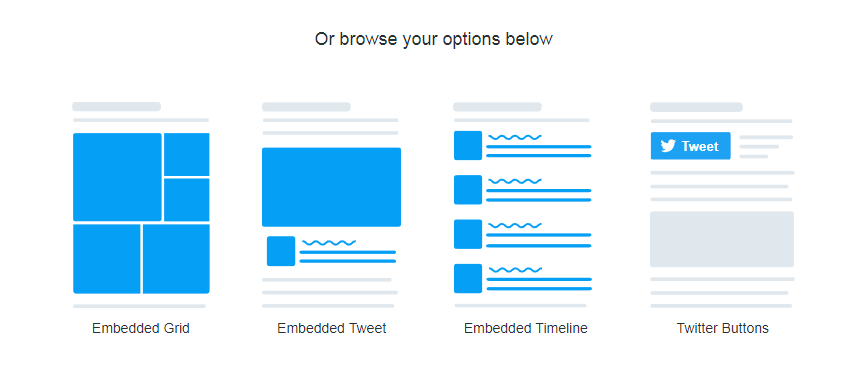
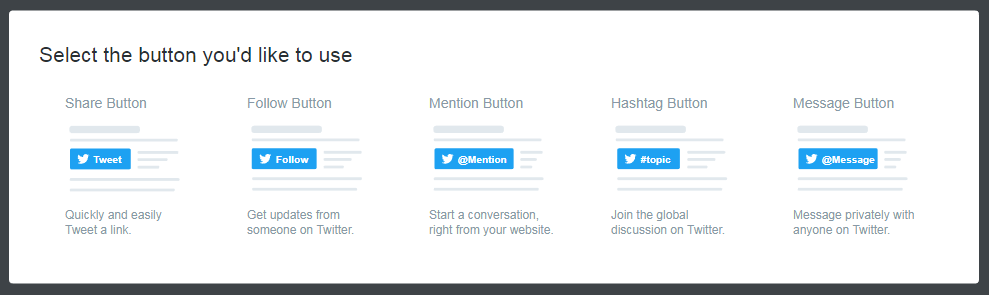
This will present you with a number of buttons you can use on your site. For now, choose the Follow Button:
In the resulting pop-up window, paste in the URL for your account and select Preview. You’ll then be able to see what the button will look like on your site.
If you want, you can click on set customization options to make a few changes to your button (such as hiding your username and making the button larger). Then, copy the provided shortcode. Log into your site, and paste the shortcode wherever you want the button to be placed.
When you’re done, your new Follow button should look something like this:

You may want to take note of the other options available on the same page. The additional button choices – such as the Mention Button and the Hashtag Button – can also be great ways to integrate Twitter with WordPress.
5. Share your blog posts on Twitter
The previous techniques have been all about adding Twitter content to your website. This helps you direct your site’s visitors to your Twitter account, improving its visibility.
Of course, you can also use your Twitter profile to promote your website. By choosing to integrate Twitter with WordPress this way, you can direct your audience back and forth between the two platforms, extending your reach in both directions.
Perhaps the best method for doing this is to send out a Tweet every time a new post is published on your site. This ensures that your Twitter audience is aware of new articles, and saves you from having to create a lot of content specifically for the platform.
Once again, this is a common feature that can be found in a lot of social media plugins. So you may want to check and see if any of the plugins you’re currently using offer social media posting functionality. If not, your best bet is Jetpack’s Publicize module. Jetpack is an incredibly poplar and useful plugin, and this particular feature lets you automatically share your posts on a number of the biggest social networks.
With the plugin installed and set up, navigate to Jetpack > Settings > Shared in your dashboard. Make sure the option Automatically share your posts to social networks is turned on:
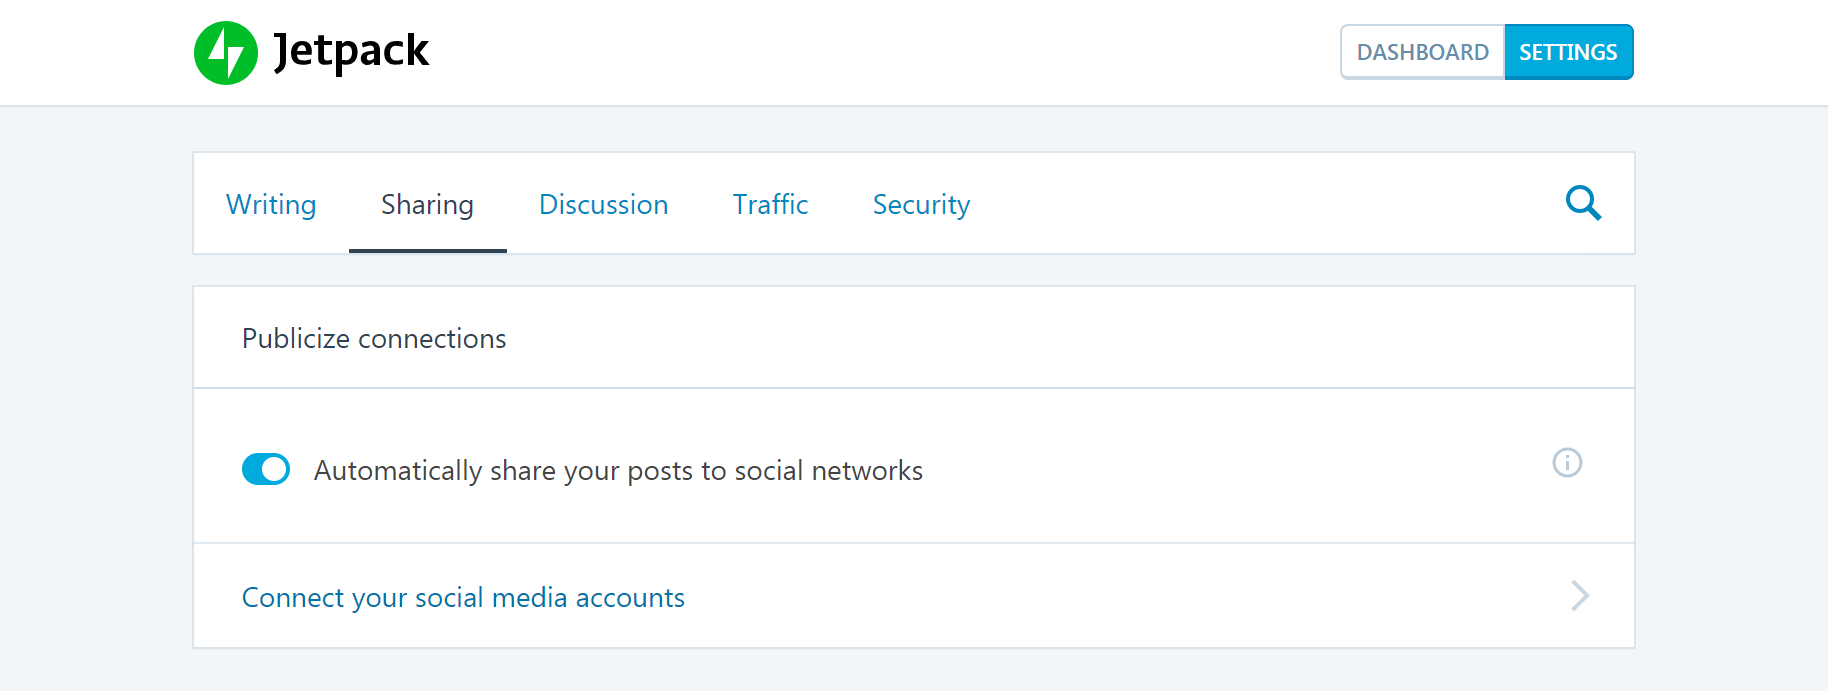
Then, select Connect your social media accounts. Click on the Connect button next to the Twitter option on the next page:
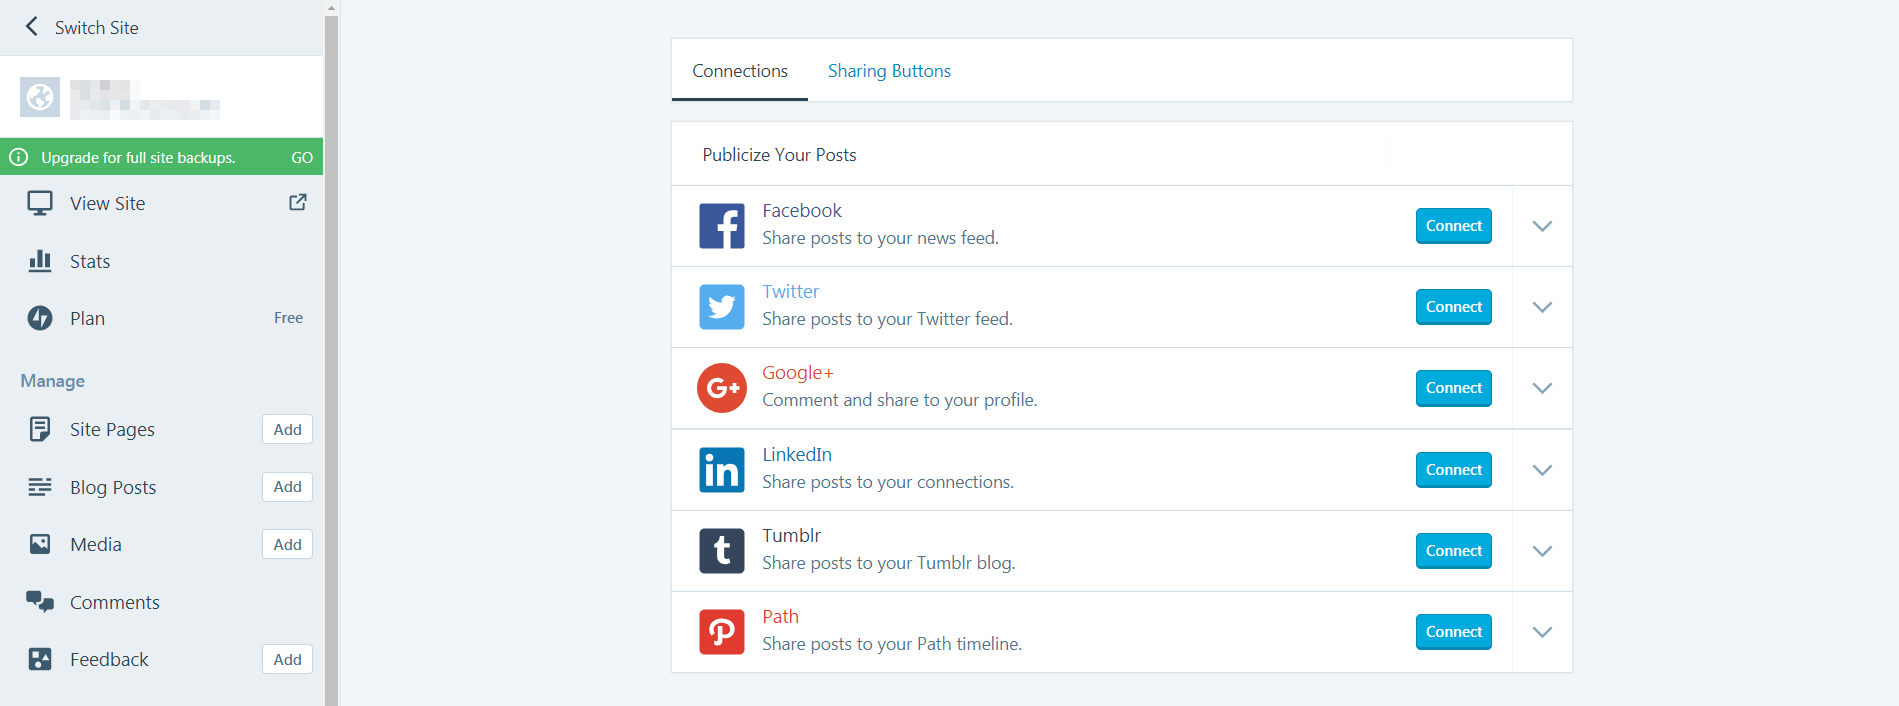
This will redirect you to a page where you can sign into and verify your Twitter account. Once that’s done, all your new posts will automatically be shared on the platform as soon as they’re published.
It can also be smart to re-share existing content periodically, to fill in your content calendar and get the most out of each piece. To do this, you can use our own Revive Old Post plugin:
After installing the plugin, go to the new Revive Old Posts tab in your dashboard. Click on the option labeled Add Account:
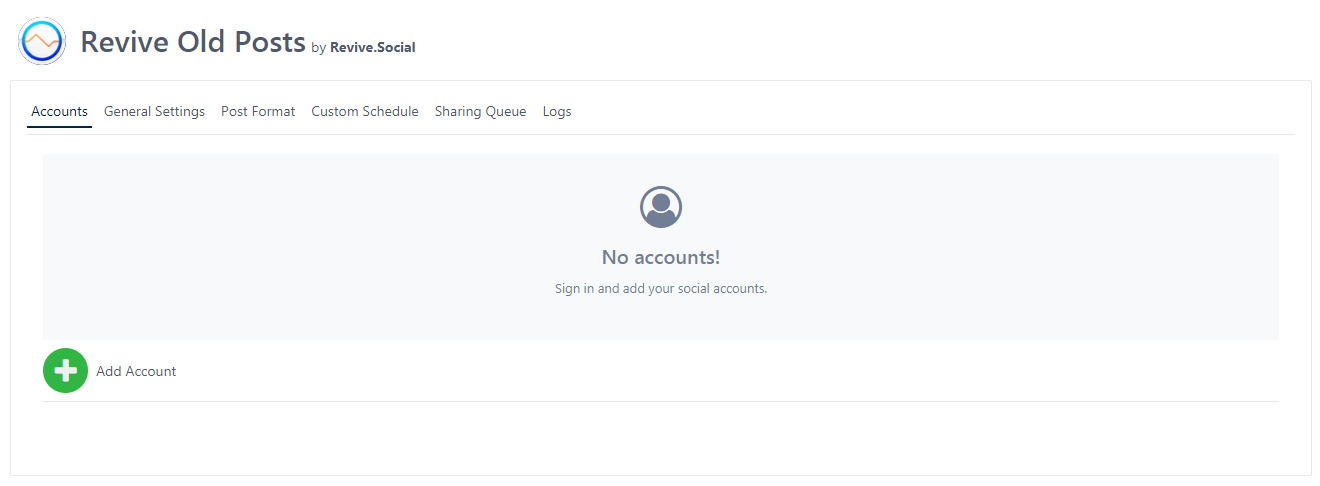
A few choices will appear, and you’ll want to select Twitter. Just as with Jetpack, you’ll be redirected to a page where you can log into your Twitter account and connect it to the plugin. After that, you can configure Revive Old Post’s settings to fit your needs. You can decide what posts to share, how they’ll appear, when they’ll be sent out, and more. Once you do that, you can sit back and let the plugin do the rest of the work for you.
Conclusion
Getting your #WordPress site and #Twitter account to work together is easier than you think
Click To Tweet
The five methods we’ve discussed are all excellent ways to integrate Twitter with WordPress and drive more traffic to both platforms. To recap, they are:
- Embed tweets into your posts and pages.
- Include ‘tweetable’ quotes in your content.
- Add your Twitter feed to your website.
- Place a ‘follow’ button on your pages.
- Share your blog posts on Twitter.
Do you know any other useful ways to integrate Twitter with WordPress? Share them with us in the comments section below!
The post 5 Ways to Integrate Twitter With Your WordPress Website appeared first on Revive Social.