Have you ever run into the problem of Facebook not displaying the correct image from your WordPress site? If so, you’re not alone. Thankfully, the Facebook Debugger allows you to quickly fix any problems you may run into.
This guide will take you through how to use the Facebook Debug tool so you can fix those pesky images – and any other Facebook sharing problems that may arise!
How Facebook fetches information
How to use @Facebook #Debugger to fix shared #WordPress images (and more) #socialmediamarketing
Click To Tweet
If you updated a page or post and it’s still sharing the old image, it means Facebook cached your old image and simply needs to be refreshed. Easy!
They also cache your link and the content itself. They fetch what’s called Open Graph Meta Tags. According to Facebook, the Open Graph protocol “enables any web page to become a rich object in a social graph.” The tags (pieces of code) give Facebook info about what you’re sharing.
How to tell if you’re using open graph protocol
You’re most likely using OGP, even if you don’t know it! Popular plugins like Yoast SEO and Social Warfare use Open Graph Meta Tags automatically, so if you’re using those plugins, you’re using these tags!
For example, take a look at our LinkedIn Marketing guide. If you look at the source code (right click and select “View page source”), you’ll see the “OG” tags, such as “og:locale” or “og:image”. This is how Facebook pulls that information:
<meta property="og:locale" content="en_US" />

<meta property="og:type" content="article" />

<meta property="og:title" content="5 Ways to Grow Your Network and Land Clients With LinkedIn Marketing" />

<meta property="og:description" content="LinkedIn is often overlooked in the social media marketing mix. But LinkedIn marketing is one of the highest converting channels with the lowest level of effort we've seen yet. Big ROI for little investment? Sounds good to me!" />

<meta property="og:url" content="https://revive.social/linkedin-marketing/" /><meta property="og:site_name" content="Revive Social" />

<meta property="article:publisher" content="https://www.facebook.com/ReviveSocialWP/" />

<meta property="article:section" content="Social Media Marketing" />

<meta property="article:published_time" content="2018-04-23T11:00:38+03:00" />

<meta property="article:modified_time" content="2018-04-24T11:30:51+03:00" /><meta property="og:updated_time" content="2018-04-24T11:30:51+03:00" />

<meta property="og:image" content="https://s15158.pcdn.co/wp-content/uploads/2018/04/Featured-Image-LinkedIn-Marketing.png" /><meta property="og:image:secure_url" content="https://s15158.pcdn.co/wp-content/uploads/2018/04/Featured-Image-LinkedIn-Marketing.png" />

<meta property="og:image:width" content="695" /><meta property="og:image:height" content="308" />
How to properly use the Facebook Debugger
The Facebook Debugger was created to help you solve issues with Open Graph Meta Tags while catching troubleshooting issues. Like all tools, however, if you don’t follow the instructions, you’ll run into more problems than solutions. So here’s how it’s done!
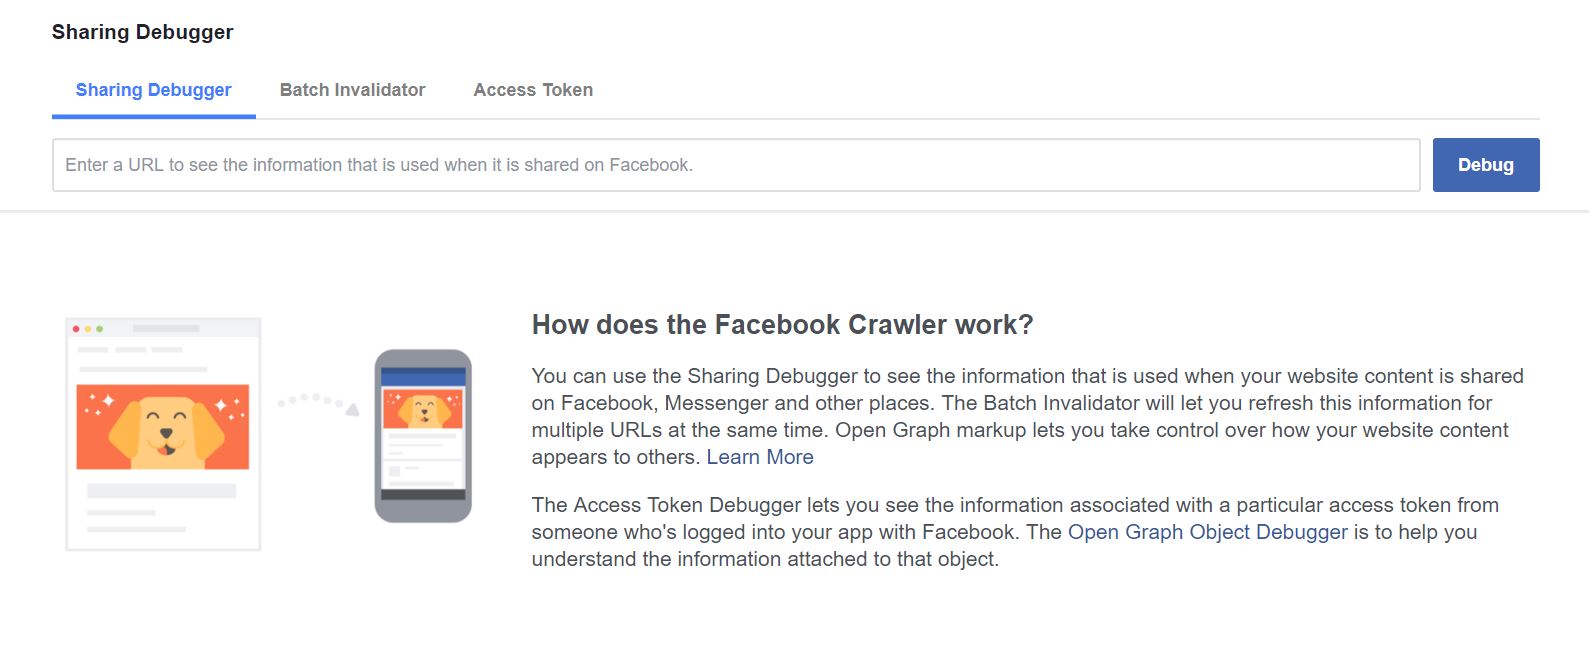
You can find the Facebook Debugger on the Facebook developer site under Tools & Support. Here.
To crawl a post, simply enter the URL and hit “Debug”.
Let’s go through a real-time example. I recently added a featured image for an article I wrote on camping gear that didn’t have a featured image. Here’s what happens when I first debug the URL:
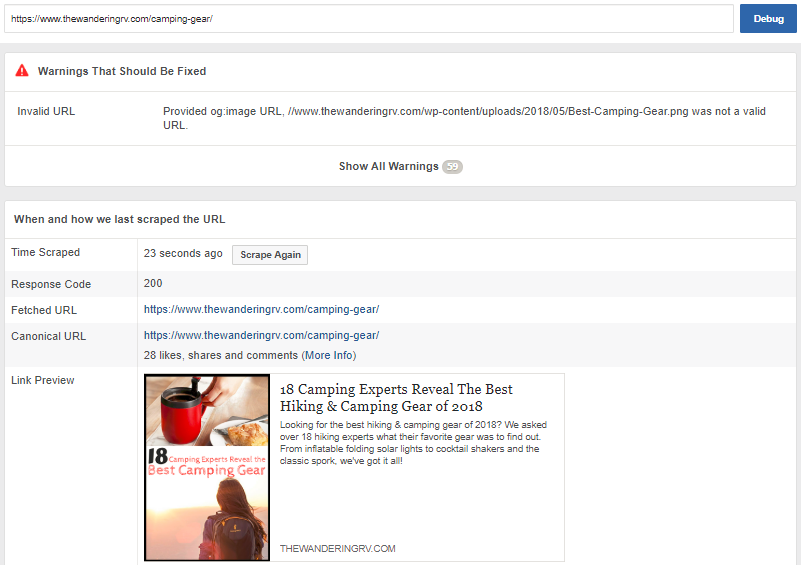
The “Link Preview” is the old, cached data Facebook is fetching from my article. It’s what people are seeing any time they share the article – not good!
As you can see, the tool is giving me an error, saying the og:image URL wasn’t valid. This is because I didn’t set a featured image, so it’s trying to pull data that isn’t there. Now that I’ve updated the image, there are two steps to get this fixed.
Step 1: Clear the WordPress cache for that URL
The first step is to clear the cache on YOUR site. There are technically two layers of caching going on here – your site’s caching, and Facebook’s caching. So if the old information is cached on your site, the debugger won’t fix the problem.
Depending on what caching plugin you’re using, the steps for this vary. Here are a few guides to the most common plugins:
- Clear cache on a specific page/post with WP Rocket
- Clear cache on a specific page/post with Cache Enabler
- Clear cache on a specific page/post with WP Fastest Cache
If you’re still having issues after clearing your cache, it could also be cached on your CDN network. So you may have to purge your CDN cache as well.
Step 2: Scrape again in Facebook Debugger
Once you’ve cleared all your caches, all you have to do it paste your URL in the Facebook Debug tool and click “Scrape Again”.
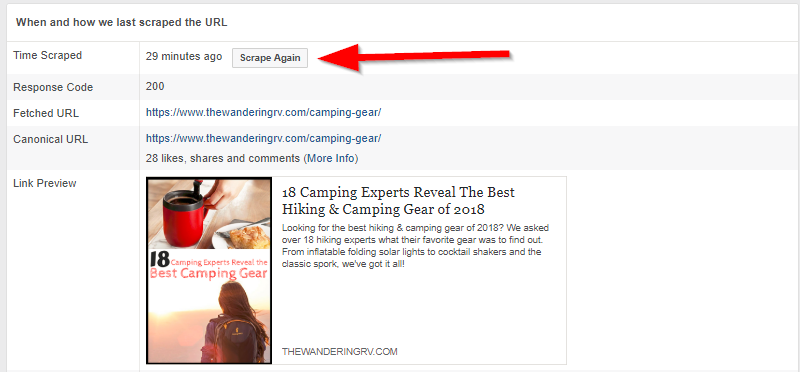
Now you might get a warning telling you the image file is wrong or too big, or the server didn’t respond fast enough.

From what I’ve found, 99% of the time this problem goes away if you simply hit Scrape Again a second time. That’s what I did after getting this error, and here’s what happened:
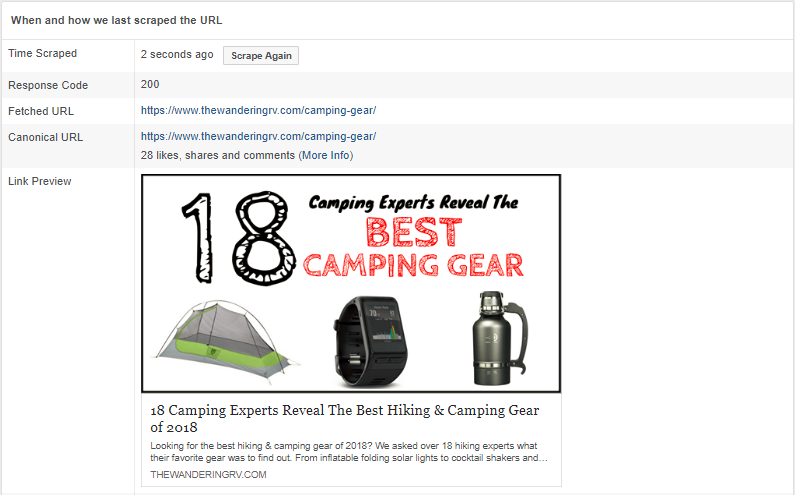
The image is fixed! Note that this won’t change images on previously shared posts, only on any newly created posts.
Facebook Debugger tips & tricks
While these two steps will fix the majority of issues, here are some extra things to be aware of to make sure you get your images working.
The provided ‘og:image’ properties are not yet available
If you’re seeing this warning, it typically means your image is too small.

The minimum Facebook image size is 200×200 pixels. If your image is smaller than that, you’ll get an error message.
The best Facebook image size is 1,200 by 630 pixels.
However, you can make your images bigger than that. Just keep in mind that anything over that size will be cropped, so keep an aspect ratio of roughly 2:1 to avoid any issues.
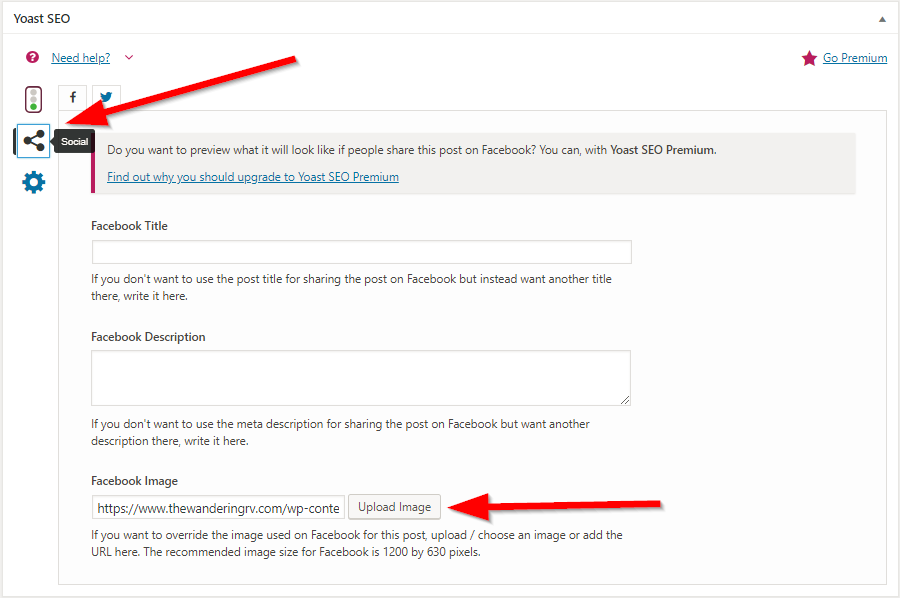
Alternatively, if your Featured Images need to be a different size, you can set a specific share image using Yoast SEO’s social setting.
The following required properties are missing: fb:app_id
This error message should only concern you if you want to track app data in your Facebook Insights reports. If you don’t have an app, you can completely ignore this message.

If you want to track your app data, here are the steps using Yoast SEO:
- Create your Facebook App: https://developers.facebook.com/docs/apps/register
- Copy your Facebook App ID from the app dashboard.
- In your WordPress dashboard, click on “SEO” on the left-hand side.
- Under the “Facebook” tab you can enter in your Facebook App ID.
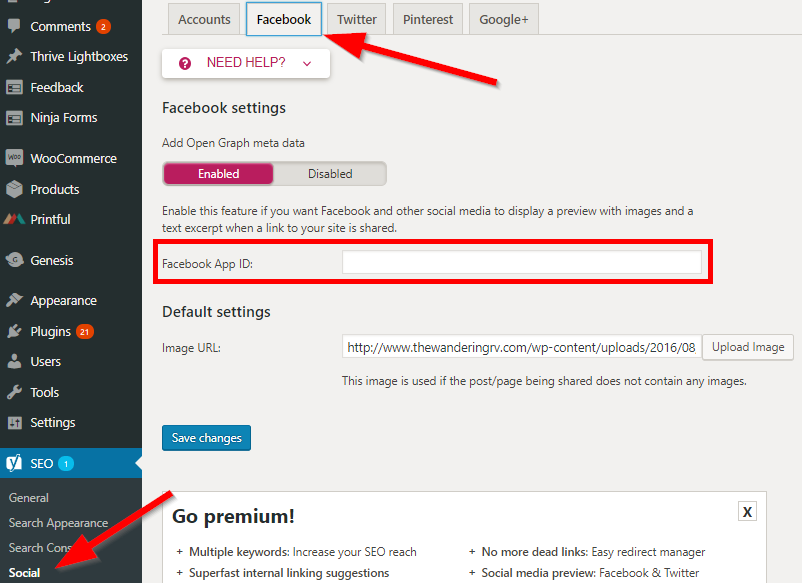
And that’s all there is to it! You can now track Facebook App ID data.
What did we learn?
Don’t forget to scrape twice – for whatever reason, that’s how it works.
The #Facebook debug tool is a super easy way to fix your FB share featured image, title, and description
Click To Tweet
If you have any questions about the debugger or have insights we skipped over, be sure to leave a comment below!
Read next: 3D Facebook Posts: Everything a Marketer Needs to Know
The post How to Use the Facebook Debugger to Fix WordPress Images in Facebook Shares appeared first on Revive Social.