It’s not uncommon to see this message next to your Facebook Ads: Rejected. This typically means that you must edit something within your ad or change the target audience selections. After rectifying the situation, you can resubmit the advertisement, which usually doesn’t take more than a few minutes for approval.
However, some ads get rejected for good, while for others, there’s simply no way to edit the Facebook ad to make it appropriate for the platform.
We’ll guide you through all the situations in which you may find your Facebook Ads rejected. In addition, we’ll cover where to find the rejected ads, how to fix them up, and what measures you can take if none of your corrections resolve the problem.
Keep reading to get your money’s worth with Facebook ads and learn all about how to handle Facebook Ads getting rejected.
 Table of contents:
- Facebook Ads rejected? Why did it happen?
- Where to look to figure out if/why your Facebook Ad was rejected
- How to submit a review after Facebook Ads are rejected
- How to contact support after your ad gets rejected
Facebook Ads rejected? Why did it happen?
Facebook has a long list of restricted and prohibited content in its policies. The restricted content is allowed but you must follow certain rules, often based on your locale. Prohibited content is never allowed on Facebook.
There’s a much longer list, but here are some of the main reasons Facebook Ads get rejected due to violations with restricted content:
- Illegal content for certain parties, like if you target an ad with alcohol to people under 21 in the United States.
- Discriminatory content.
- Ads that use Facebook brand assets.
- Ads that infringe upon copyrights or trademarks.
- User interface screenshots.
- Lead ads requested sensitive information like criminal history, health, or sexual orientation.
- Ads with poor positioning, like inaccurate product descriptions or irrelevant images.
- Ads that target to discriminate or provoke.
- Restricted content for certain locales and individuals, like with cryptocurrencies, social issues, or pharmaceutical drugs.
Of course, some content is completely rejected from Facebook as prohibited content. Some examples include:
- Illegal products or services.
- Tobacco-related items.
- Drug-related ads.
- Weapons and ammunition.
- Adult content with nudity or suggestive imaging.
- Misinformation or sensational content.
- Profane or grammatically poor content.
- Ads with malware.
- Ads promoting predatory business practices, like multilevel marketing.
Where to look to figure out if/why your Facebook Ad was rejected
The first step in handling a rejected ad is to actually figure out if it was rejected in the first place. I’ve noticed that I’ve never received an email for a rejected or pending Facebook Ad, so it’s easy to publish an advertisement, leave Facebook, then realize later that it hasn’t been running at all.
Therefore, we recommend sticking around on Facebook for a few minutes to see if your recent ad has passed the initial automated test. In general, it’s best to check back in with Facebook until you’re absolutely certain the ad has reached the “Published” or “Active” level.
So, let’s say you just clicked the Publish or Boost Post Now buttons. You feel you’ve followed all the rules and designed an appealing advertisement and set the right audience. Where do you look to figure out if the Facebook Ad has been rejected or accepted?
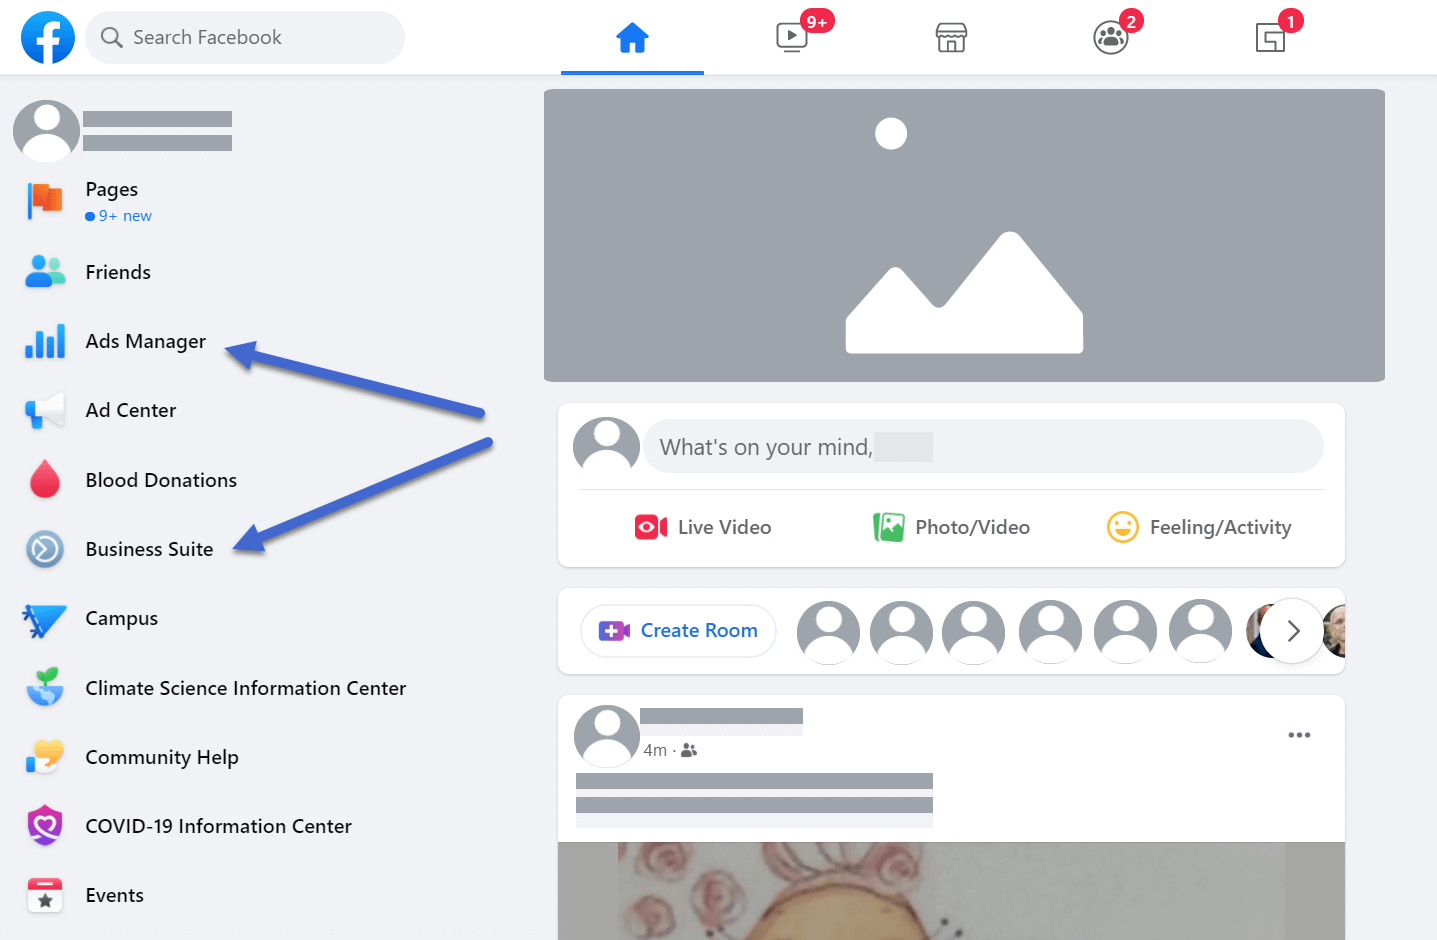
Begin by looking at your main Facebook profile dashboard. There, seek out the Ads Manager button. Click on that.
There are actually several other ways to see your past ads on Facebook, such as the Business Suite page or the Ad Center. We still feel the Ads Manager is by far the easiest option for handling new, old, and future ads, yet the Business Suite has some additional tools for designing larger campaigns.

Once in the Ads Manager, you’ll see a summary of your past ads, tools to generate new ads, and filters for viewing ads for up to 90 days.
Scroll down on this page to reveal your past ads.

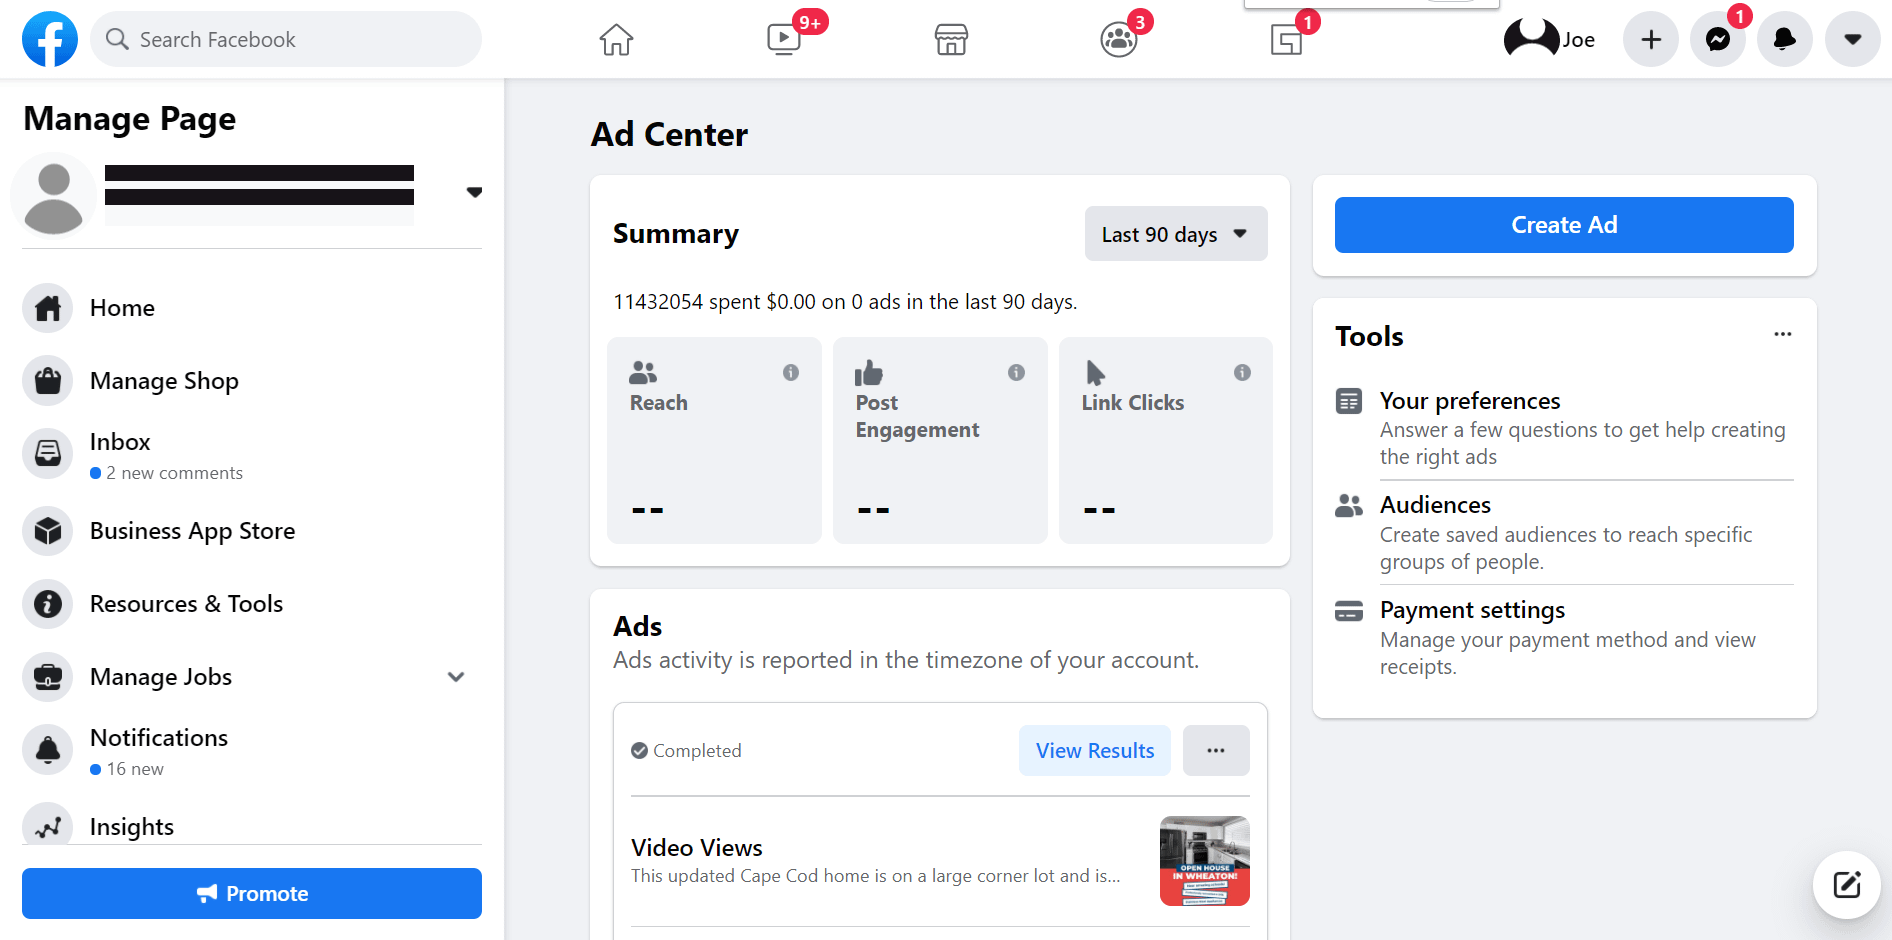
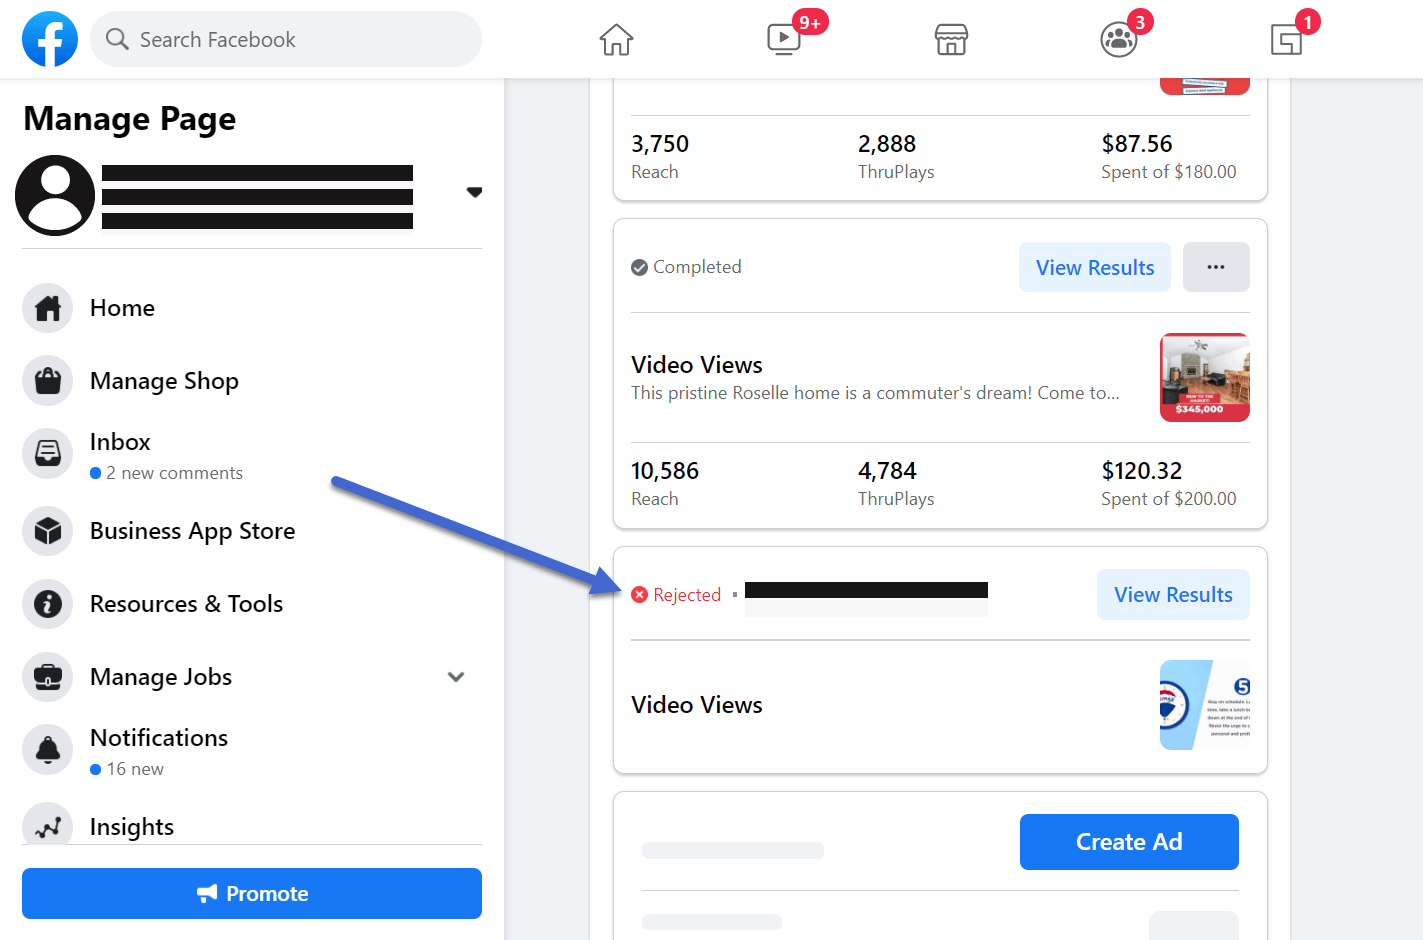
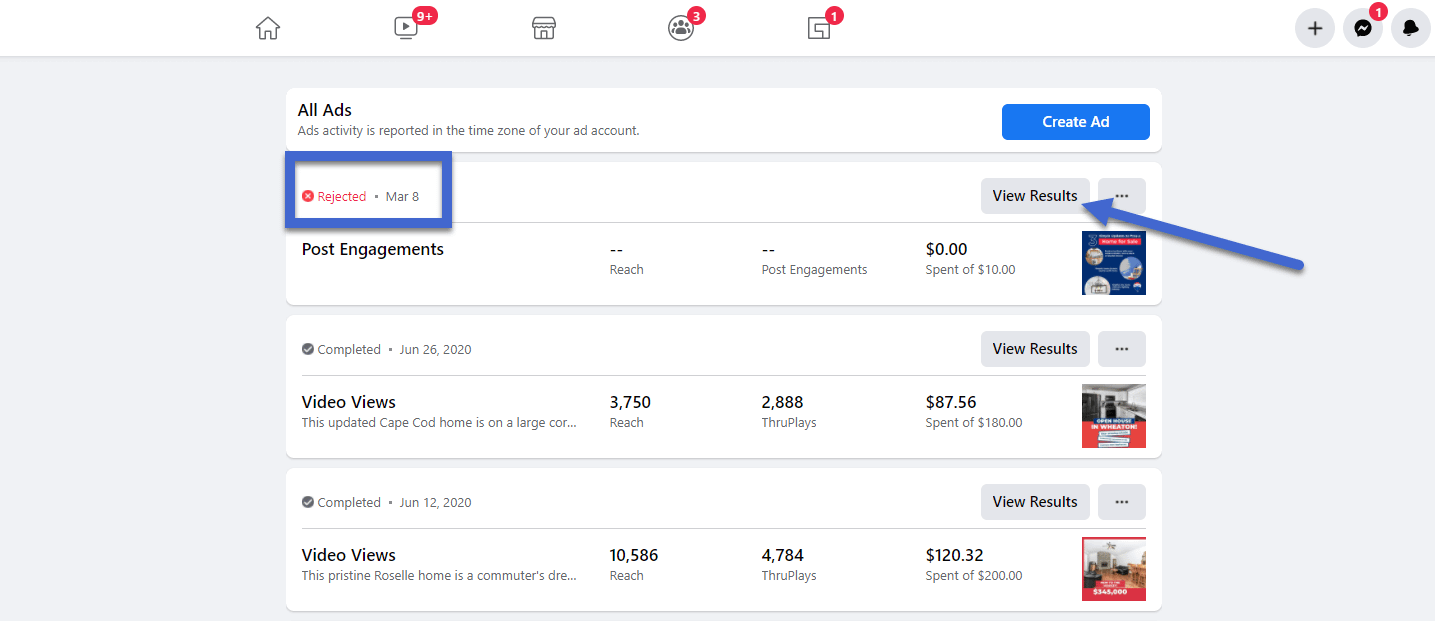
Your most recent ads get listed one-by-one, with information about the reach, thruplays, and amount spent for each successful ad.
However, you can also see red-lettered warnings from the ads that received the Rejected tag.
These are the ones that we’re concerned about in this situation.

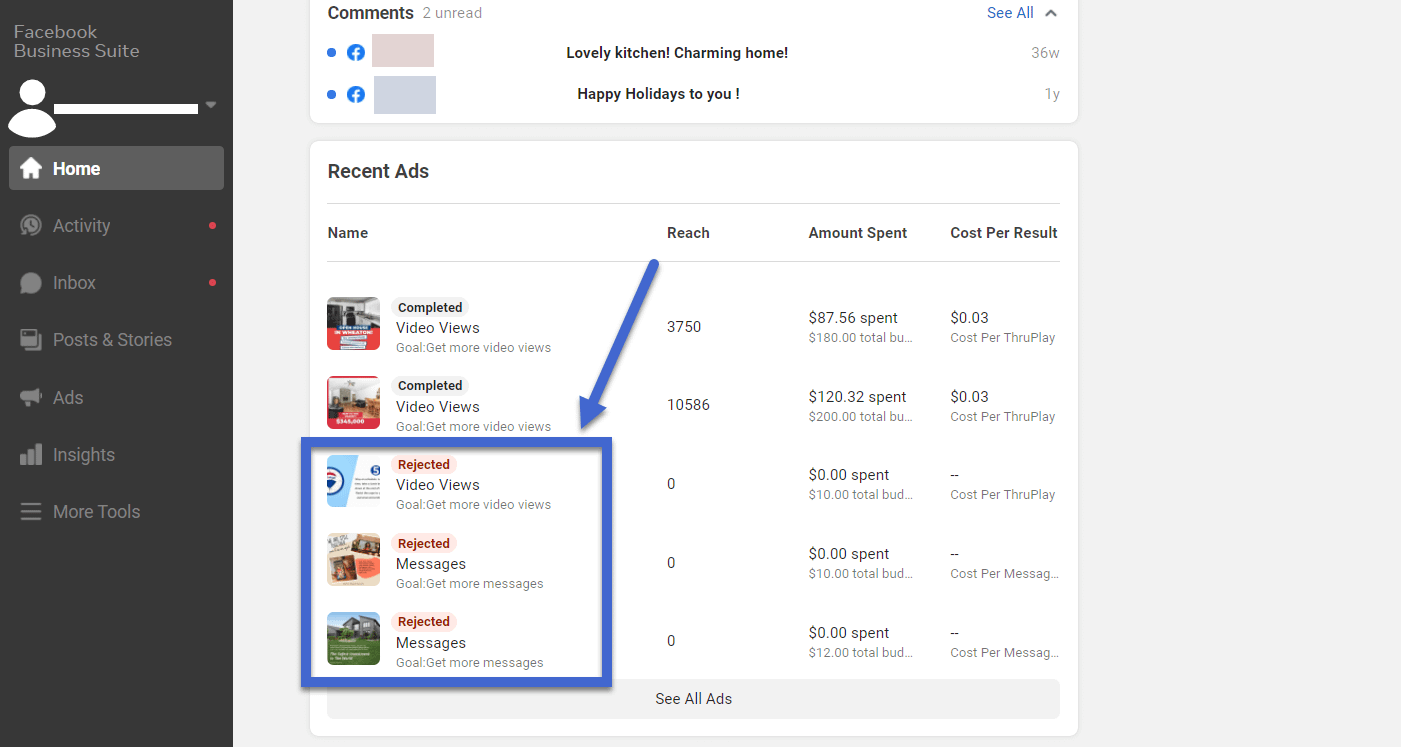
As an alternative, you can find the rejected Facebook Ads on the Facebook Business Suite page. Go down to the Recent Ads section for a similar list from the one in the Ads Manager.

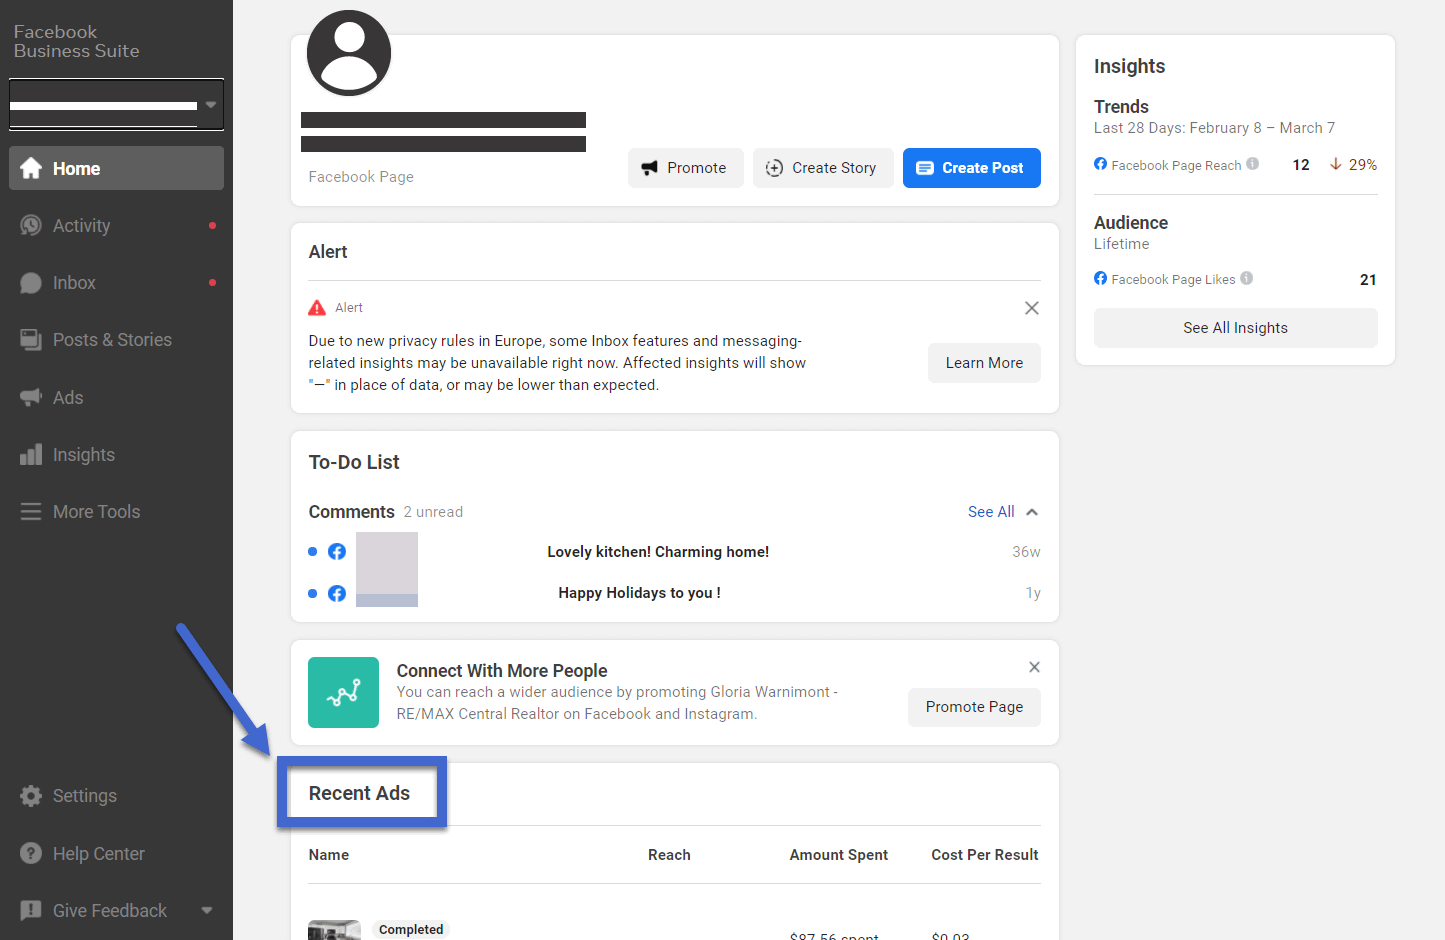
Again, all Rejected ads receive that same red message. Seeing as how they’re rejected, all metrics should show zeroes.

Finally, Facebook also tends to warn you of rejected ads in the Notifications panel. View these notifications by clicking on the dropdown menu in the upper menu of Facebook.
Keep in mind that I’ve experienced a few rejected Facebook Ads in the past, and the most reliable places to see rejections are within the Ads Manager or the Facebook Business Suite.
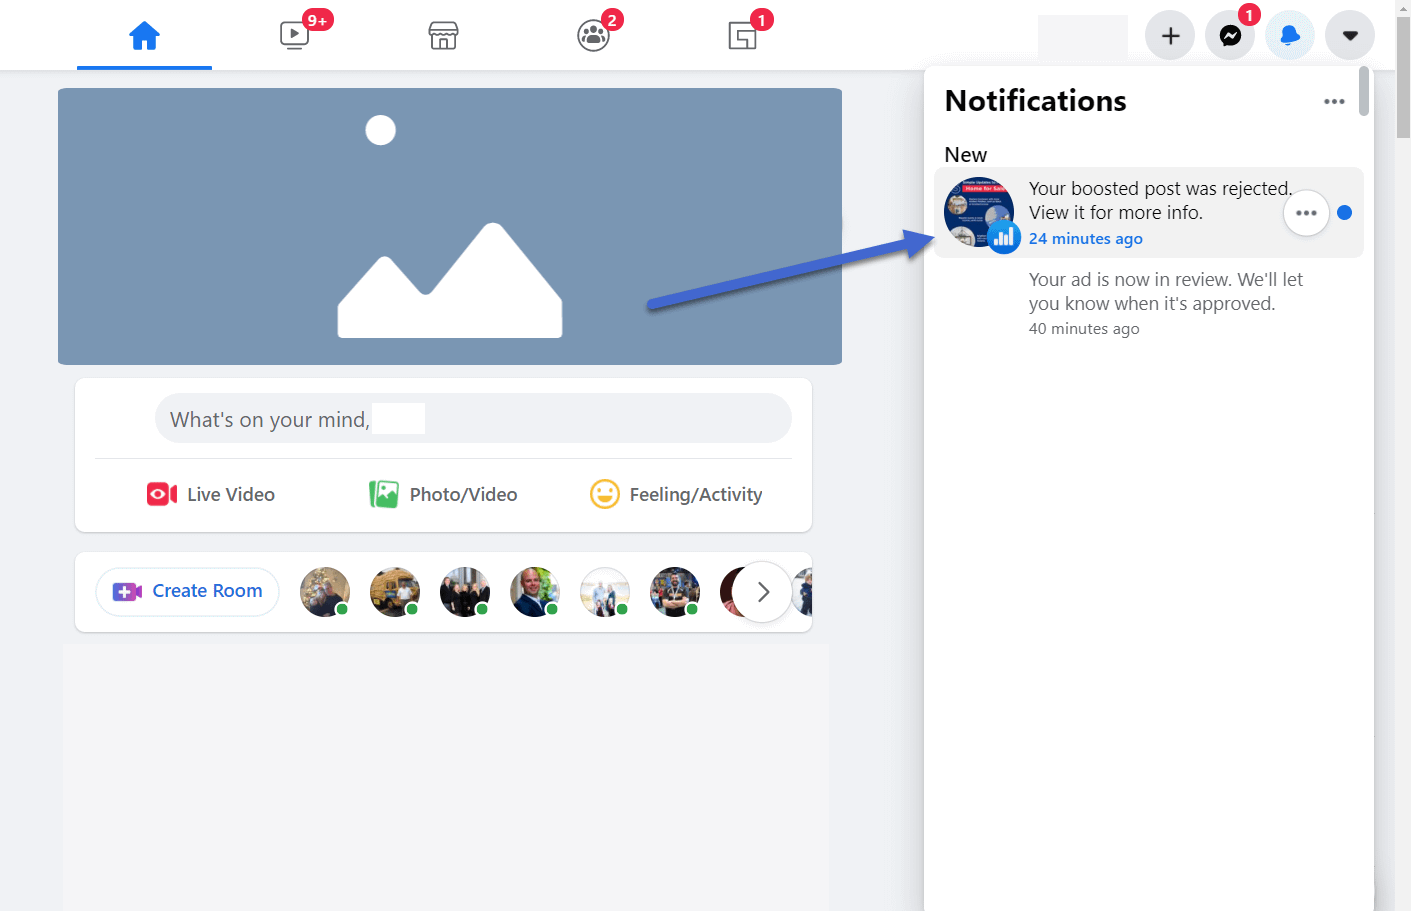
I’ve rarely received emails from Facebook about rejected ads, and the Notifications tab often takes a day or two to update you about a pending ad. In my experience, there have been times when the Notifications tab didn’t reveal a message about an ad being rejected. So, although it can help in some situations, I wouldn’t rely on the Notifications panel for an important advertisement that needs publishing.

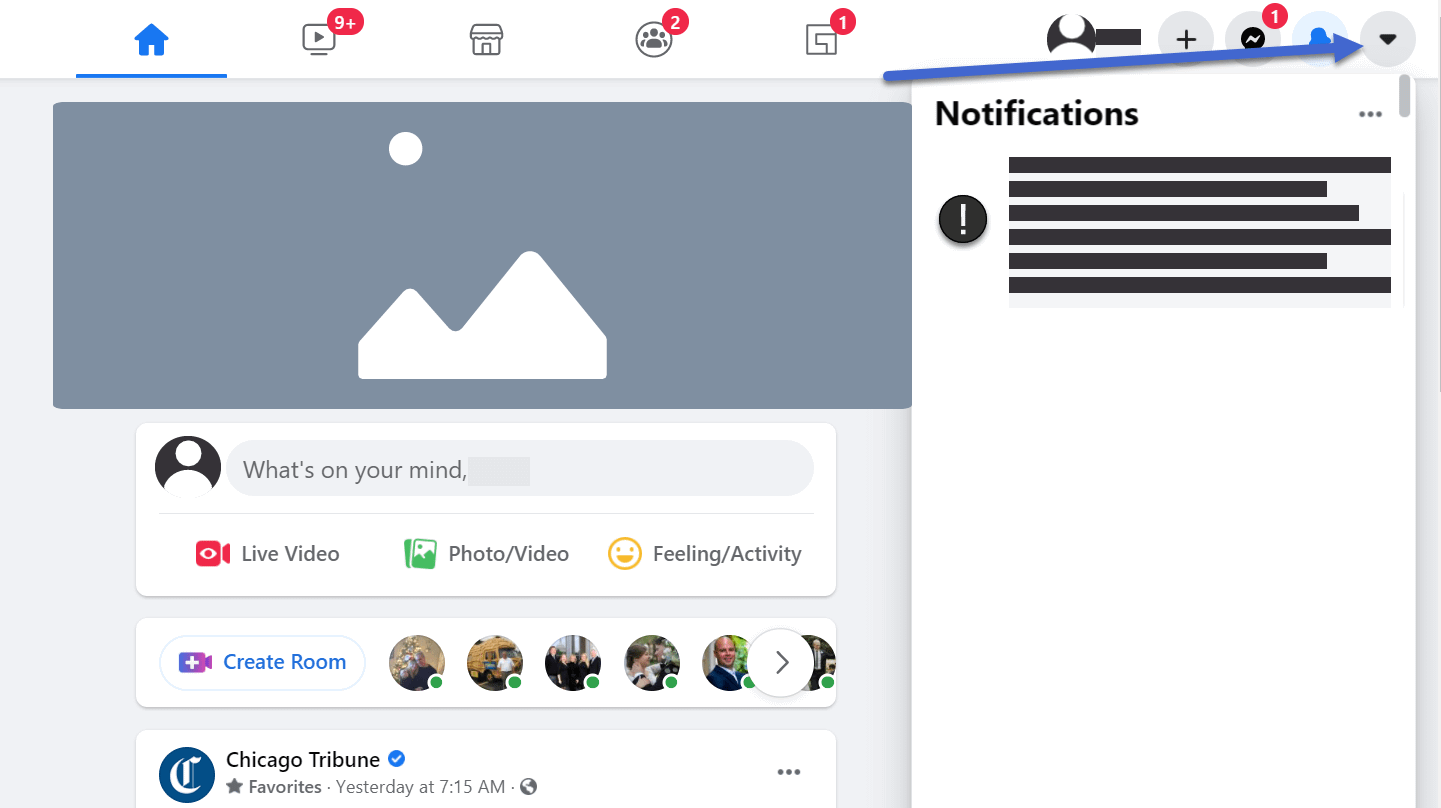
For instance, the following notification came in about 45 minutes after I tried to publish my Facebook Ad.

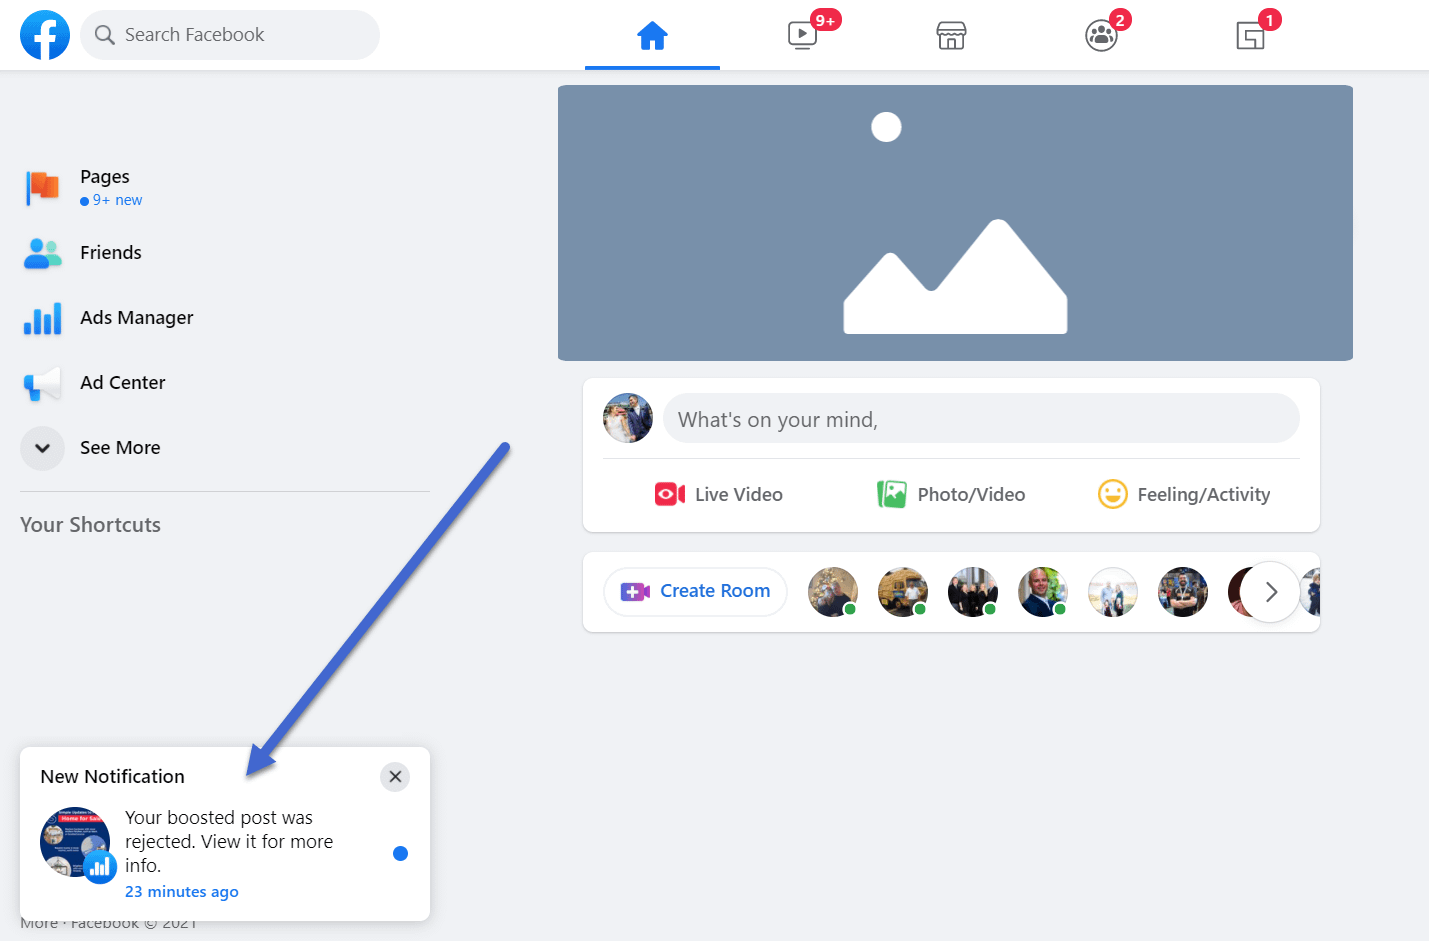
It also included a little notification at the bottom of my screen.
Again, these are helpful reminders, but easy to miss. Not to mention, they take a little longer to show up, or they don’t appear at all.
Your best course of action is sticking with one of the other methods for viewing rejected Facebook Ads.

How to submit a review after Facebook Ads are rejected
All Facebook Ads go through several automated review processes prior to publication. By automated, we mean that algorithms and bots handle the heavy lifting. This can end up frustrating for some trying to advertise since it’s not exactly an easy task trying to reason with a computer or robot about an ad that should not get rejected. After the initial automation, you have the opportunity to reach out to the Facebook customer support team. However, that’s a last-ditch effort, and usually not an effective one, as Facebook customer support can take some time to reply, and they often can’t provide any leeway for your advertisement.
With that said, there are two ways to dispute ad rejections: automatically or by sending an email to customer support.
The first step is to submit your Facebook Ad for approval. All ads received this treatment, seeing as how Facebook must field all sorts of ad content ranging from illegal to immoral.
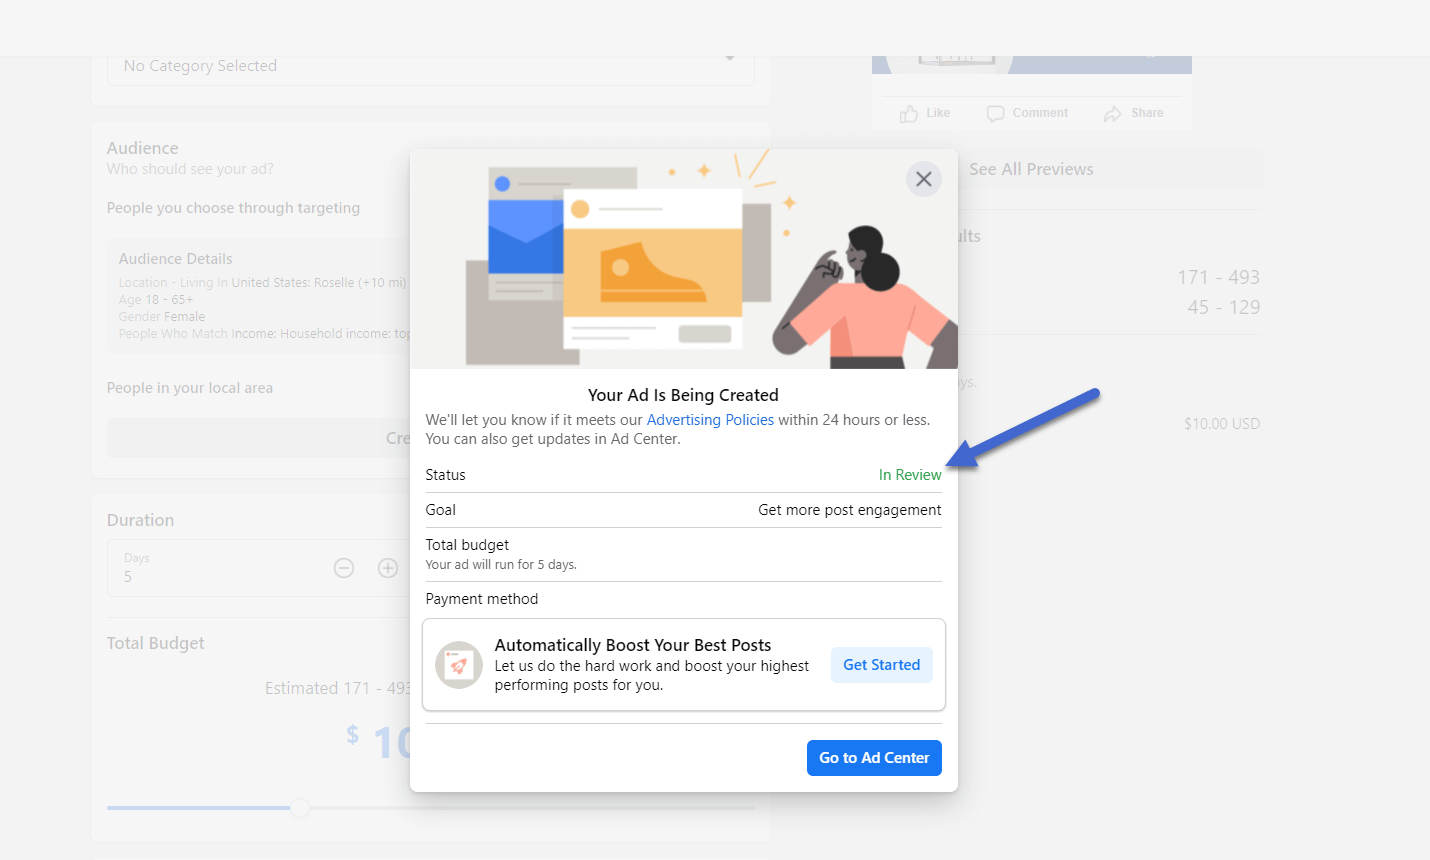
A message appears after you submit an ad. It should say that your Ad Status is In Review.

Using the techniques to check the status of your ad (covered in the previous section), go to the Ads Manager to see what’s going on with your most recent ad.
In general, an ad that follows all the rules and looks professional enough for publication receives a green “Active” message next to it.
However, a red “Rejected” message tells you that the automated Facebook review system flagged your ad for violating its rules.
Whether you find this justified or not, there’s no way to fix the problem unless you edit the ad and resubmit it for further review.
Therefore, click on the View Results button next to the Facebook Ad in question.

All rejected Facebook Ads include details about why it was rejected in the first place.
You get a red icon and message along with a lengthy description of the rule you broke. More often than not, it has something to do with the content within the ad or the audience you planned on targeting.
Below is a great example. I tried to run an ad for a real estate open house. However, the real estate industry has several laws in place (in the US) that prevent discrimination based on things like race, income, and gender.
It turns out I chose to target my Facebook Ad to people in a certain income class. Now, you might think that would be acceptable considering real estate is often only purchased by those who can afford it. However, the law says that you can’t block out people from seeing a potential real estate opportunity just because they don’t make a certain amount of money.
What’s nice about the View Results section is that it provides quick information about the rule and additional links to read about running ads in special ad categories (like real estate, politics, employment, and credit) and for information about discrimination. It depends on which rule you break, so you may see links to other clarifying documents.

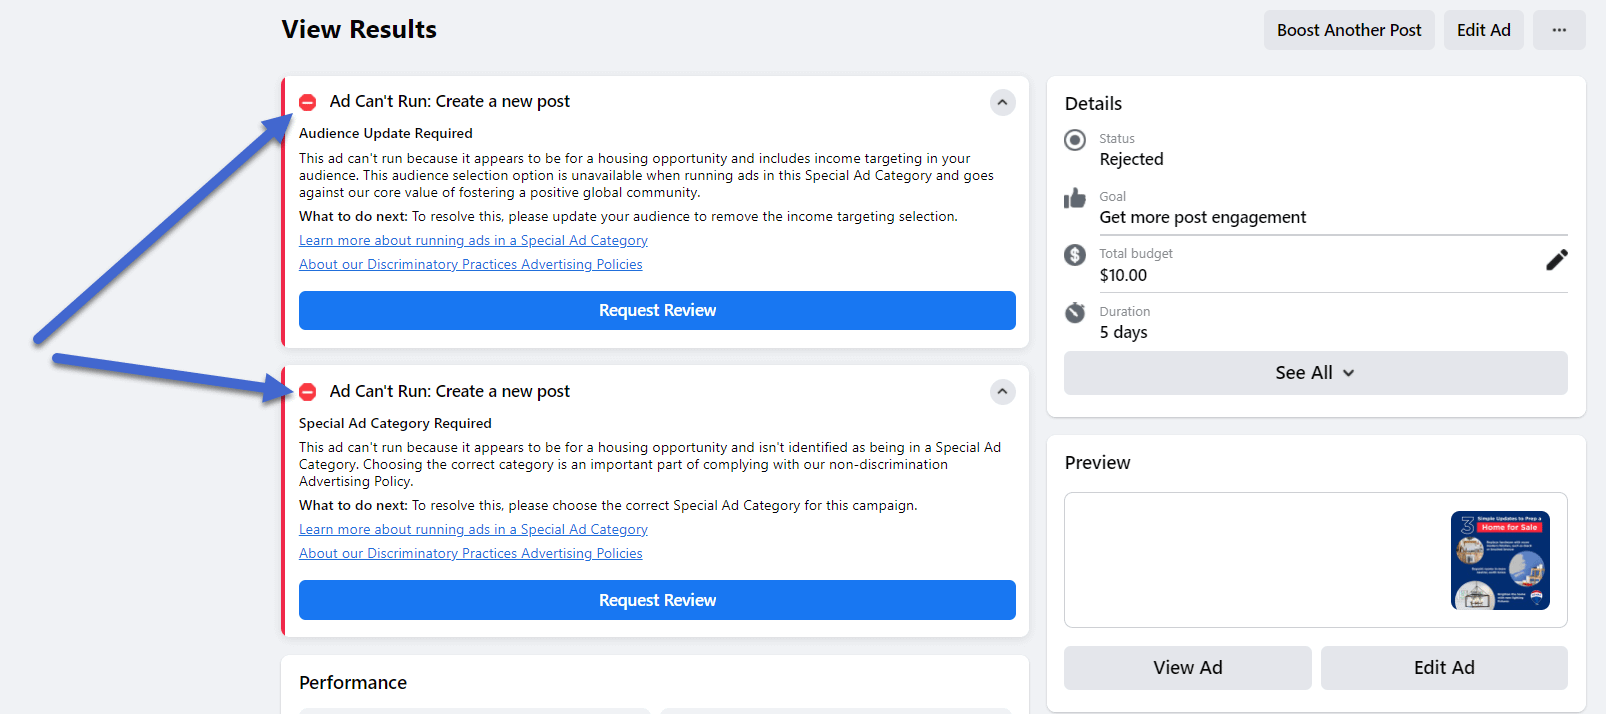
It often seems easy to immediately click on the Request Review button to try and force your ad through. However, you’re much better off editing the ad and trying to remove the questionable content or targeting practices. After that, you can select the Request Review button and show that you made a good faith effort to fix all problems.
For now, click on the Edit Ad button for the rejected Facebook Ad.

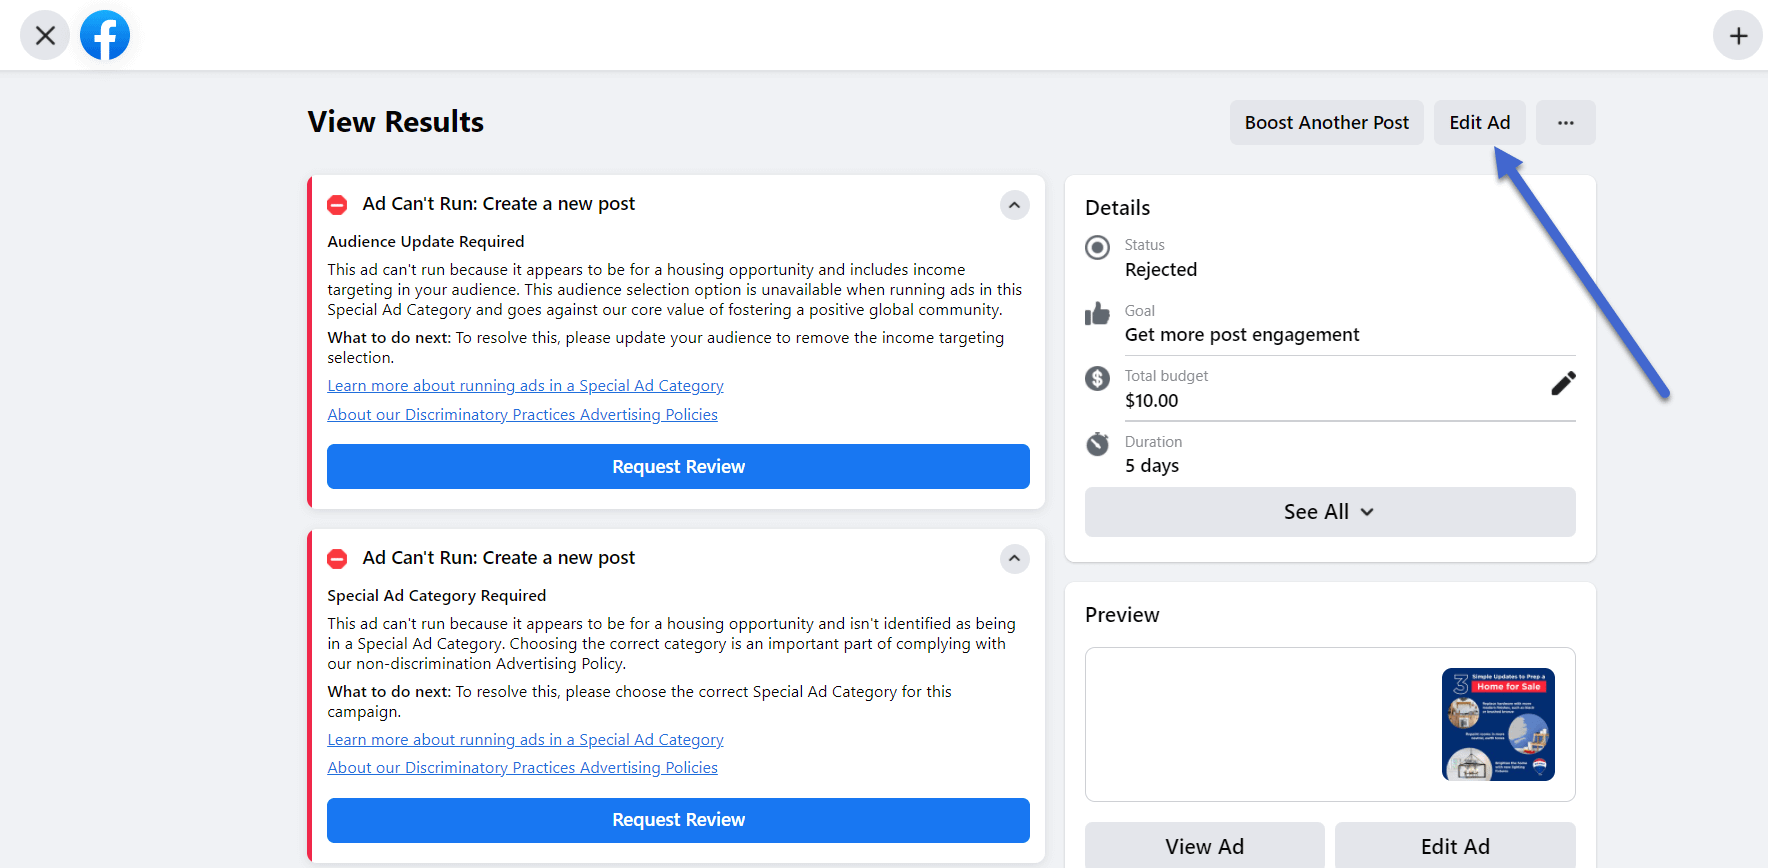
Each case varies in terms of the edits required.
You may find that you need to remove personal or inappropriate content within the text or photo of your advertisement. Other times, you might have to change the target audience or remove some of the filters you have included.
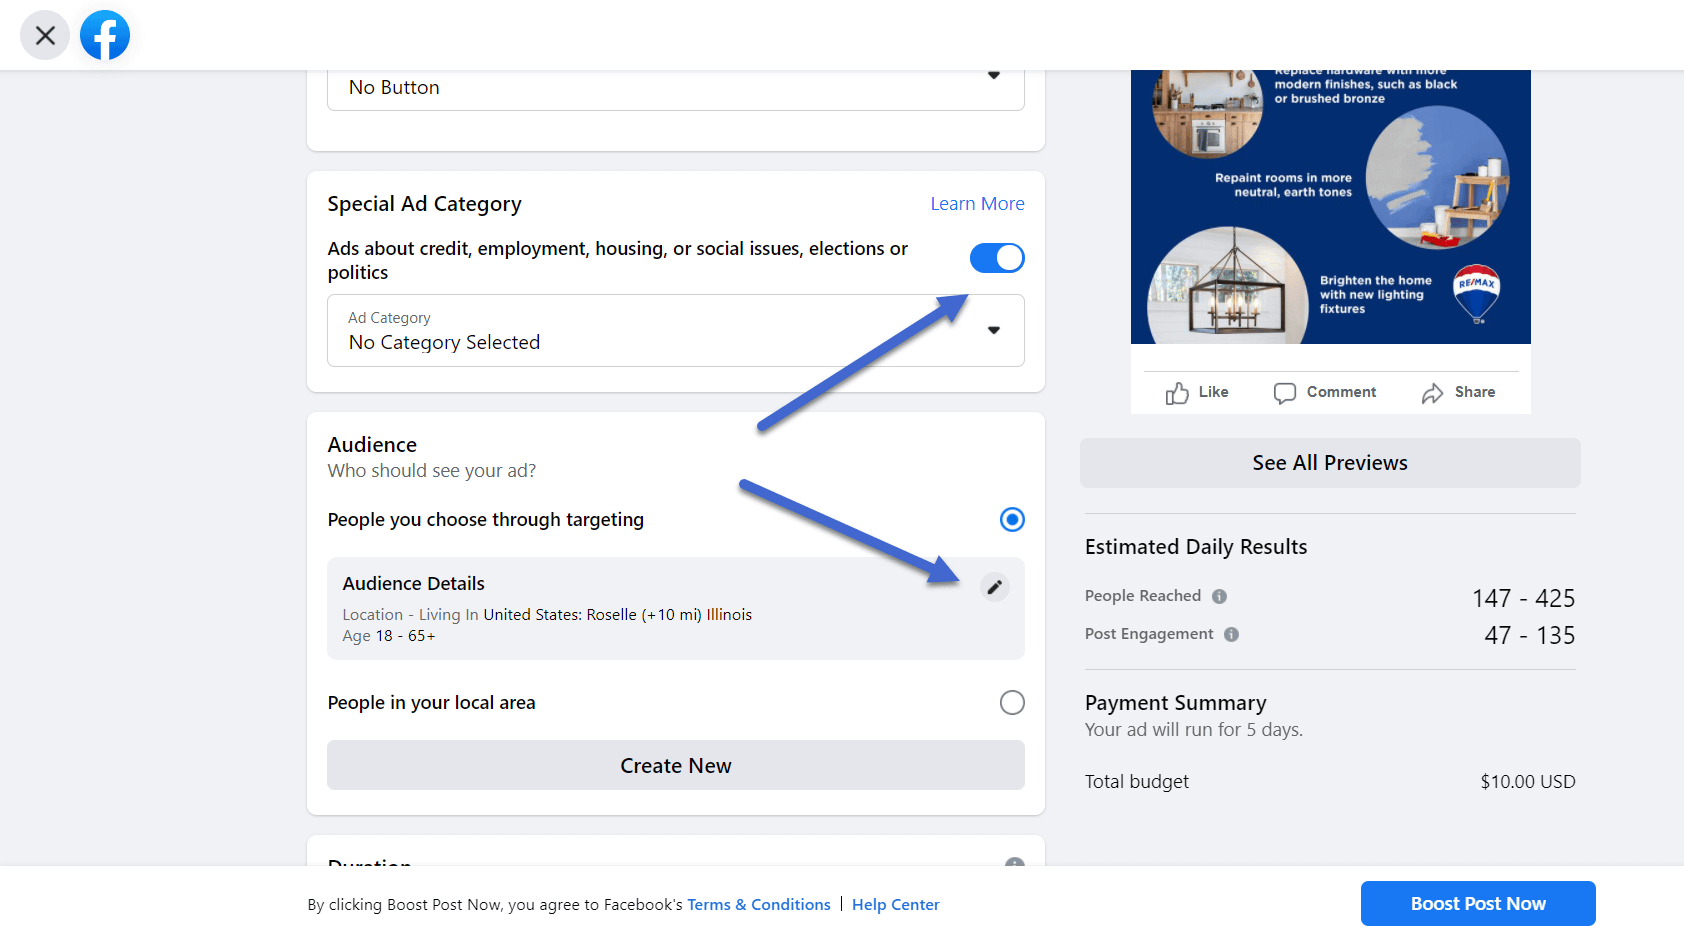
For this example, I have to check the Special Ad Category box and specify that I’m posting an ad about housing.
Furthermore, I need to edit the Audience Details, seeing as how I’m not allowed to target customers based on things like gender or income level.

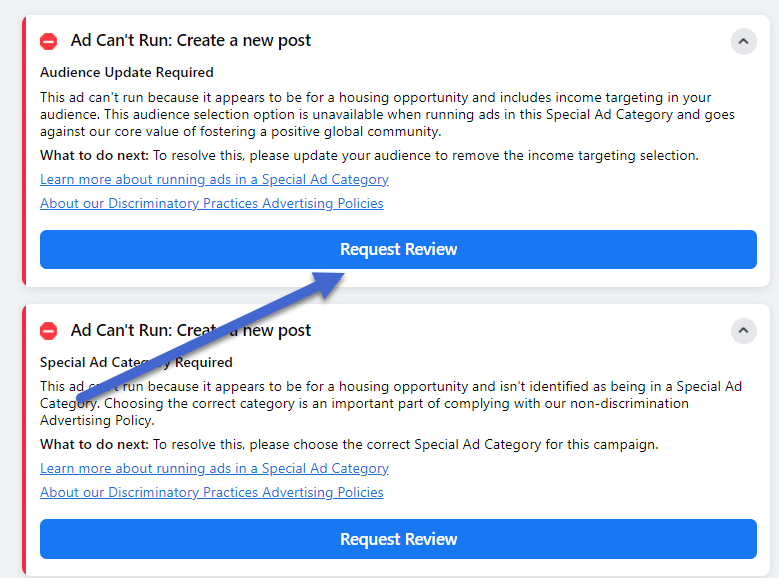
The final step, after making edits to the original ad, is to go back to the View Results page and click on the Request Review button. This brings up one popup window to confirm that you have made the appropriate modifications to the Facebook Ad and would like to have it reviewed once more.
Keep in mind that you may have to click the Request Review button multiple times if you violated more than one rule.

The review process may take a little longer than the initial rejection. To check on the status of your review, go back to the Ads Manager page to see the status. Messages like “Approved,” “In Review,” and “Rejected” are all possible.
The end goal is to see the “In Review” message change to an “Approved” or “Active” message.
If you once again receive a “Rejected” message, continue onto the following steps to complete a more formal request.
How to contact support after your ad gets rejected
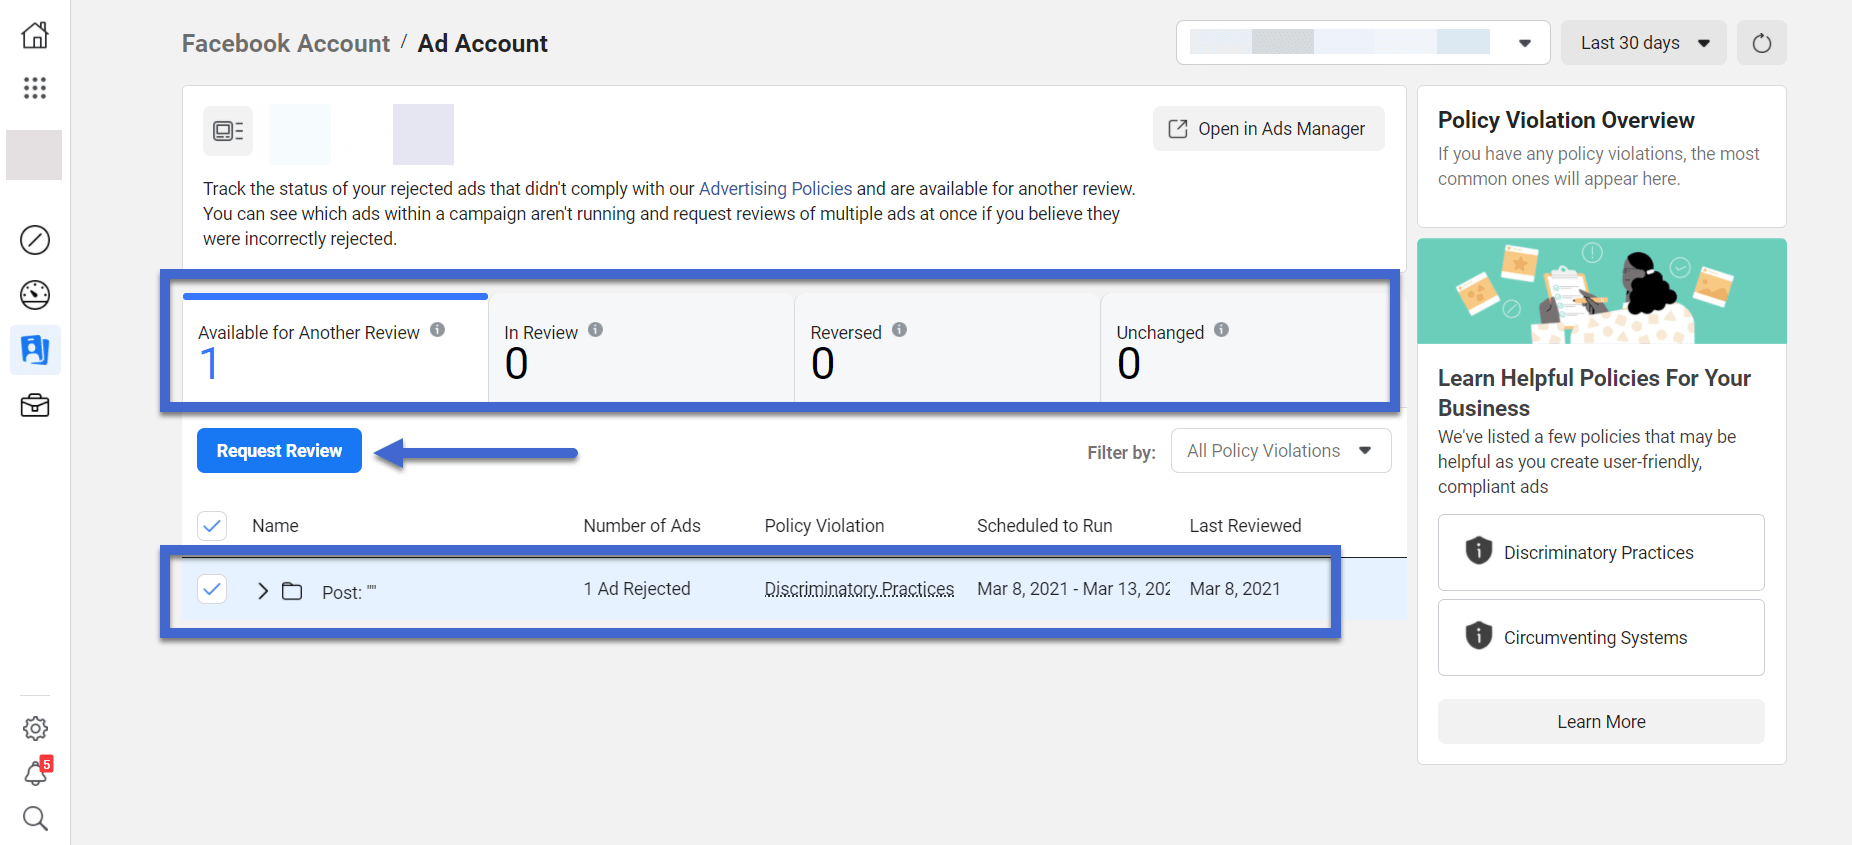
A Facebook Ad rejected for the second time typically gets placed into a category of “Unchanged,” meaning the rejection status remains the same. A great place to monitor more detailed information about your status is on the Account Quality page on Facebook.
It’s important to monitor this page because too many problems on your ad account could get you banned from posting. They may also remove your Facebook account completely.
On this page, you can see which ads are available for another review. For most ads, you get one try to fix the problems, follow the rules and submit for another review. If you fail that review, the ad typically gets sent to the Unchanged bin, where it can’t be edited. In that case, you must start a new ad altogether.
Not all ads receive an opportunity for another review. The ones that get completely rejected are those that are blatantly immoral or illegal, like ads with references to hate-speech or radicalism.

However, sometimes you want better customer support than an automated algorithm.
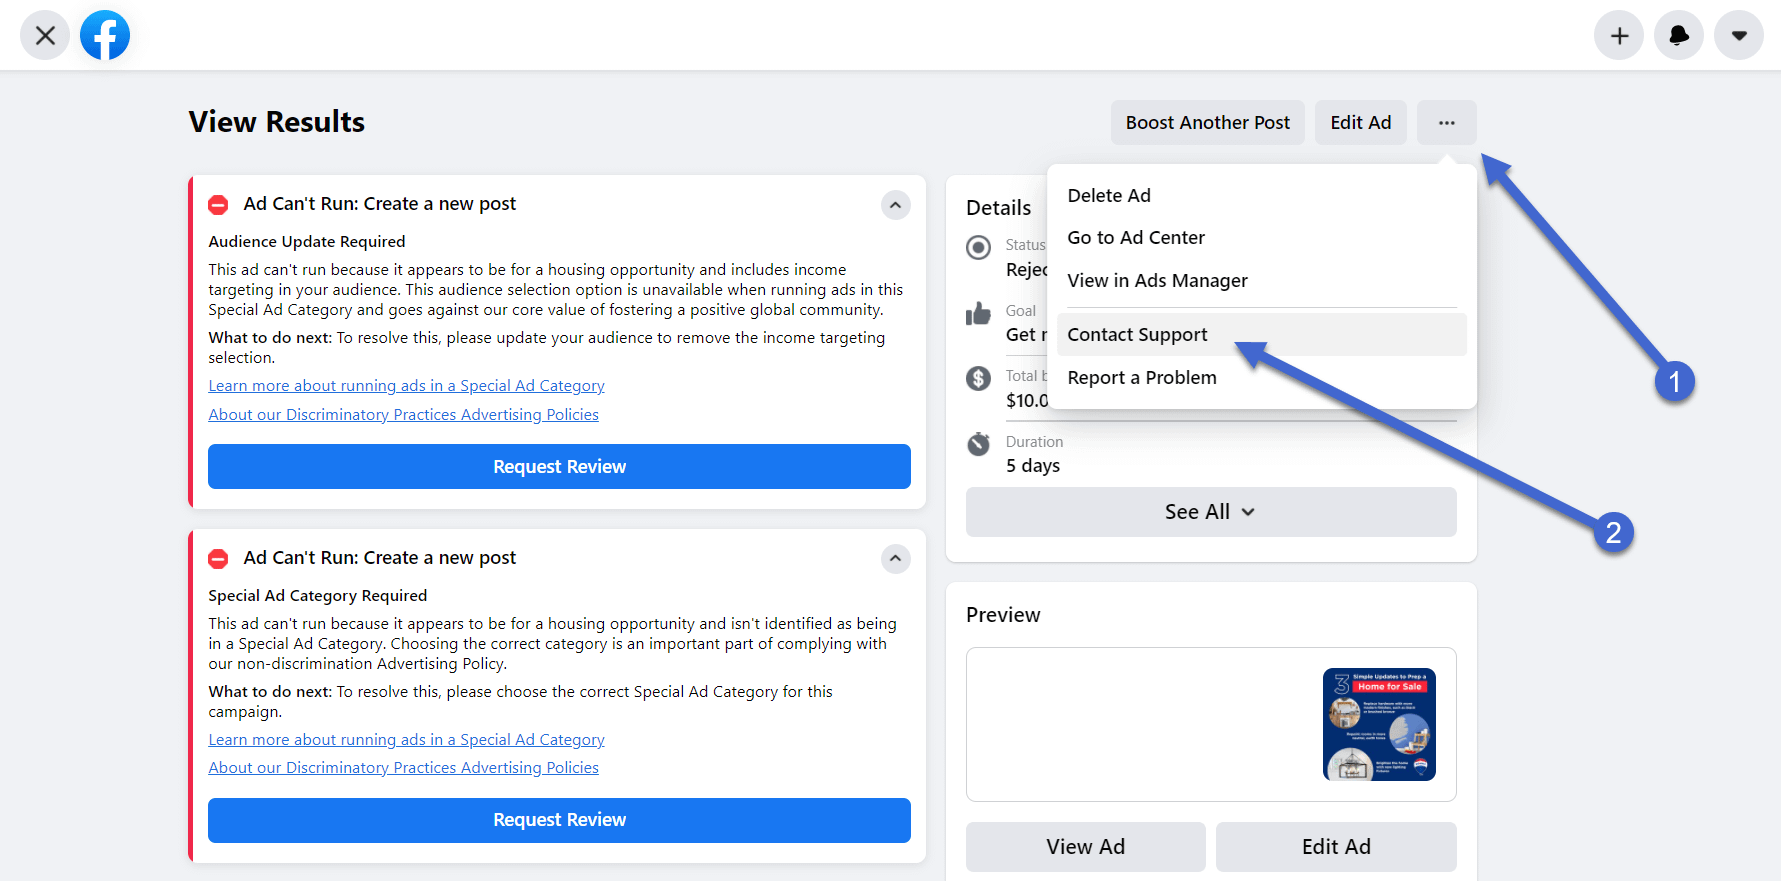
In that case, go back to the View Results page for the ad in question. You can find the View Results button for the ad within the Ads Manager page on Facebook.
Click on the “…” ellipsis icon in the upper right-hand corner of the page.
This shows a dropdown menu with several options.
Select the Contact Support button to proceed.

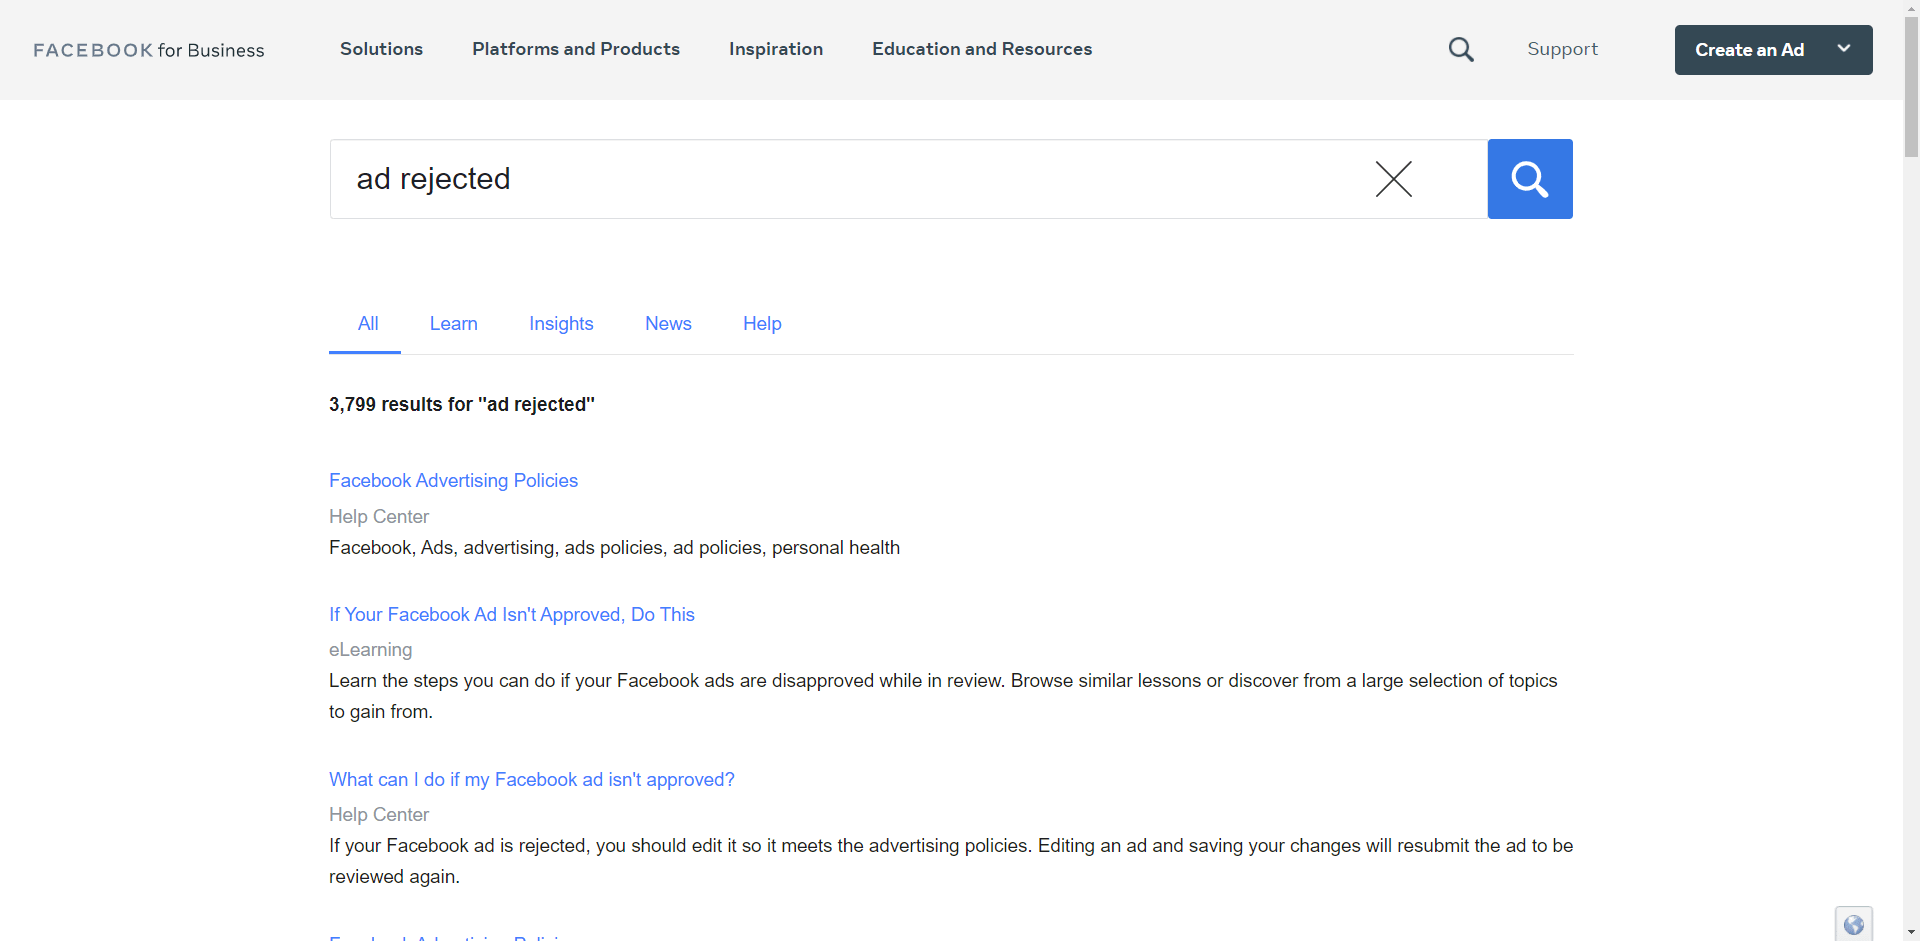
This delivers you to the Facebook for Business knowledgebase. It’s not human customer support, but it could help guide you down a path to correcting a rejected ad. We recommend browsing through the articles and potentially typing in “ad rejected” to see the most relevant pieces.

As for true human support, there’s not much to expect from Facebook.
However, Facebook does have hundreds of specific contact forms (that are very difficult to find) to reach a customer support rep for certain problems.
The form for Ads Pending Review for More Than 24 Hours is the closest thing to a direct contact form for Facebook Ad questions. You may even be able to get a response for slightly different concerns, as long as Facebook Ads are involved.
In conclusion
The key with a declined Facebook Ad is to keep calm and play the game.
Although it’s frustrating that Facebook hardly offers any customer support, you can do yourself a favor by simply editing the ad the right way and submitting it again for review. Cutting corners could automatically block an ad, after which you’ll have a tough time getting in touch with a real person.
Have questions on how to not make Facebook reject your ads? Ask in the comments section below.
The post Facebook Ads Rejected? Why It Happened and How to Fix It appeared first on Revive Social.
